Blogs > Migrating the Dispatcher Configuration from AMS to AEM as a Cloud Service
Dispatcher
Migrating the Dispatcher Configuration from AMS to AEM as a Cloud Service
August 31, 2024Introduction
Migrating an AEM AMS (Adobe Managed Services) Dispatcher to AEM as a Cloud Service involves using Adobe I/O CLI (aio CLI) tools to manage and deploy the dispatcher configurations. This process requires careful planning and adherence to Adobe’s best practices for AEM as a Cloud Service. In this blog, we’ll walk through the step-by-step process of converting AMS Dispatcher configurations and making the necessary updates to the converted Dispatcher files.
Step 1: Install Node.js
Ensure that Node.js is installed on your system. If it isn’t, download and install the latest version from the following link: https://node js.org/en/download
Step 2: Install the Adobe I/O CLI Tool
Open the command prompt and run the following command to install the Adobe I/O CLI:
npm install -g @adobe/aio-cliStep 3: Install AEM Cloud Service Migration Plugins
Install the necessary AEM Cloud Service migration plugins by running the following command
aio plugins:install @adobe/aio-cli-plugin-AEM-cloud-service-migrationStep 4: Verify the Installation
To verify that the CLI tools are installed correctly, run the following command:
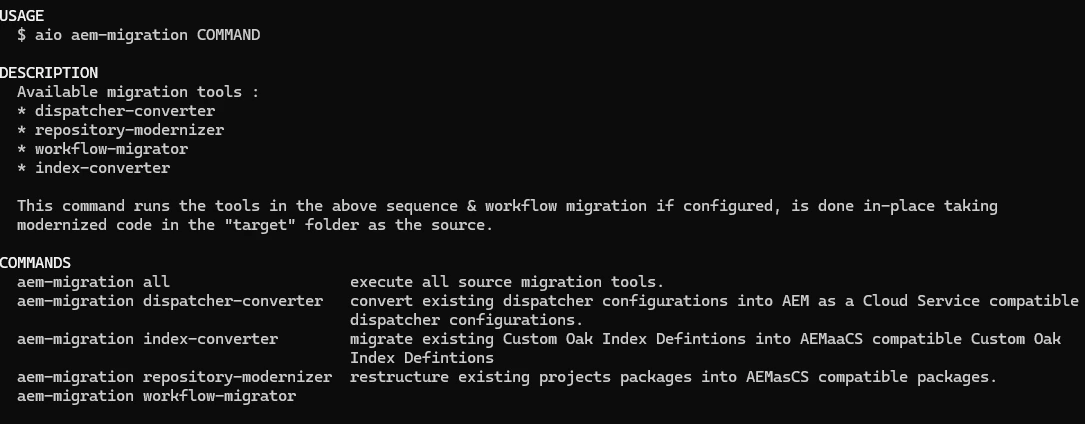
aio AEM-migration --help This command will display the list of available tools.
Step 5: Configure the Migration Tool
Navigate to the configuration file located at:
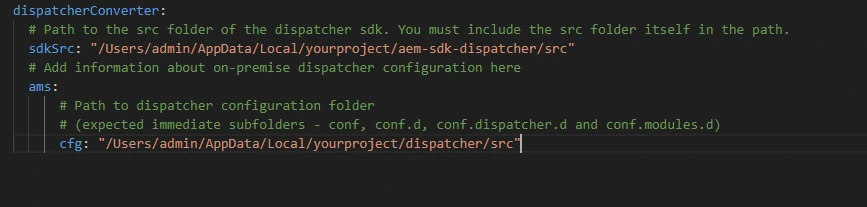
C:\Users\admin\AppData\Local\@adobe\aio-cli\AEM-migration-config.yaml Update the file with the paths to your AEM-sdk-dispatcher source and ams-dispatcher source, then save the changes.
Step 6: Run the Dispatcher Converter
Once everything is set up, execute the dispatcher conversion command:
aio AEM-migration:dispatcher-converter -t=amsAfter conversion its looks like this
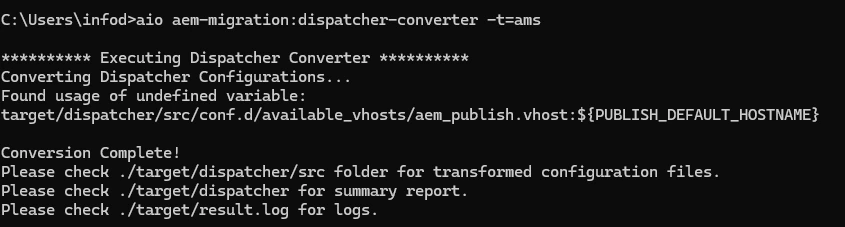
After the conversion, navigate to the target folder. You will find a newly converted dispatcher folder. Replace its src folder with the AEM-sdk-dispatcher source files.
Note :
If you encounter any errors during the process, check the logs in the following file for details:
                            ./
                            ├── conf.d
                            │   ├── available_vhosts
                            │   │   └── default.vhost
                            │   ├── dispatcher_vhost.conf
                            │   ├── enabled_vhosts
                            │   │   ├── README
                            │   │   └── default.vhost -> ../available_vhosts/default.vhost
                            │   └── rewrites
                            │   │   ├── default_rewrite.rules
                            │   │   └── rewrite.rules
                            │   └── variables
                            |       ├── custom.vars
                            │       └── global.vars
                            └── conf.dispatcher.d
                                ├── available_farms
                                │   └── default.farm
                                ├── cache
                                │   ├── default_invalidate.any
                                │   ├── default_rules.any
                                │   ├── marketing_query_parameters.any
                                │   └── rules.any
                                ├── clientheaders
                                │   ├── clientheaders.any
                                │   └── default_clientheaders.any
                                ├── dispatcher.any
                                ├── enabled_farms
                                │   ├── README
                                │   └── default.farm -> ../available_farms/default.farm
                                ├── filters
                                │   ├── default_filters.any
                                │   └── filters.any
                                ├── renders
                                │   └── default_renders.any
                                └── virtualhosts
                                    ├── default_virtualhosts.any
                                    └── virtualhosts.any
Your Dispatcher file structure should look like this
After the conversion make some changes in dispatcher
Delete Virtual Host Files
-
Navigate to conf.d/enabled_vhosts. Delete any virtual host files whose names contain author or flush.
-
Remove all virtual host files in conf.d/available_vhosts that are not linked.
Remove or Comment Unnecessary vHosts
-
Remove or comment out virtual host files that do not reference port 80.
Check Rewrites
-
Go to the conf.d/rewrites directory.
-
Delete files like base_rewrite.rules. Also, remove any Include statements in the virtual host files referencing these files.
-
If only one file remains in the folder, rename it to rewrite.rules and update the Include statements in the virtual host files accordingly.
-
If there are multiple virtual host-specific files, merge their contents into the corresponding Include statements in the relevant virtual host files.
Check Variables
-
Navigate to the conf.d/variables directory.
-
Delete the ams_default.vars file and remove any Include statements in virtual host files referencing it.
-
If only one file remains, rename it to custom.vars and update all Include statements in the virtual host files to reflect this new name.
-
If multiple files remain, copy their contents into the corresponding Include statements in the relevant virtual host files.
Remove Allowlists
-
Delete the conf.d/whitelists folder.
-
Remove any Include statements in virtual host files referencing files in this folder.
-
Replace PUBLISH_DOCROOT with DOCROOT.
-
Remove references to the following variables: DISP_ID, PUBLISH_FORCE_SSL, PUBLISH_WHITELIST_ENABLED.
Check Cache
-
Navigate to conf.dispatcher.d/cache.
-
Delete files prefixed with ams_.
-
If the folder is empty, copy the rules.any file from the standard Dispatcher configuration (found in the SDK src folder) into this folder and update the $include statements referencing the ams_*_cache.any files.
-
If only one file remains with a _cache.any suffix, rename it to rules.any and update the $include statements in the farm files.
-
If multiple farm-specific cache files remain, merge their contents into the corresponding $include statements in the farm files.
-
Delete files with the suffix _invalidate_allowed.any.
-
Copy default_invalidate.any from the standard Dispatcher configuration into this folder and update the cache/allowedClients section in the farm files.
Check Client Headers
-
Navigate to conf.dispatcher.d/clientheaders.
-
Delete files prefixed with ams_.
-
If only one file remains with a _clientheaders.any suffix, rename it to clientheaders.any and update the $include statements in the farm files.
-
If only one file remains with a _cache.any suffix, rename it to rules.any and update the $include statements in the farm files.
-
If multiple files remain, merge their contents into the corresponding $include statements in the farm files.
-
Copy default_clientheaders.any from the standard Dispatcher configuration into this folder and replace outdated $include statements in the farm files with:
    replace
    $include "/etc/httpd/conf.dispatcher.d/clientheaders/ams_publish_clientheaders.any"
    $include "/etc/httpd/conf.dispatcher.d/clientheaders/ams_common_clientheaders.any"

    With
    $include "../clientheaders/default_clientheaders.any"
Check Filters
-
Navigate to conf.dispatcher.d/filters.
-
Delete files prefixed with ams_.
-
If only one file remains, rename it to filters.any and update the $include statements in the farm files.
-
If multiple files remain, merge their contents into the corresponding $include statements in the farm files.
-
Copy default_filters.any from the standard Dispatcher configuration and update outdated $include statements in the farm files with:
$include "../filters/default_filters.any"Check Renders
-
Navigate to conf.dispatcher.d/renders.
-
Delete all files in this folder.
-
Copy default_renders.any from the standard Dispatcher configuration into this folder.
-
Update the renders section in each farm file with:
$include "../renders/default_renders.any"Check Virtual Hosts
-
Rename the directory conf.dispatcher.d/vhosts to conf.dispatcher.d/virtualhosts and navigate to it.
-
Delete files prefixed with ams_.
-
If only one file remains, rename it to virtualhosts.any and update the $include statements in the farm files.
-
If multiple files remain, merge their contents into the corresponding $include statements in the farm files.
-
Copy default_virtualhosts.any from the standard Dispatcher configuration and update outdated $include statements in the farm files with:
$include "../virtualhosts/default_virtualhosts.any"Include Custom Variables
-
In the conf.d/variables/custom.vars file, ensure it is included in each virtual host file. This file contains custom domain names.
Validate the Dispatcher
-
Navigate to the Dispatcher folder.
-
Run the command:
-
Ensure Docker is installed on your system. The output should confirm successful validation.
bin\validate src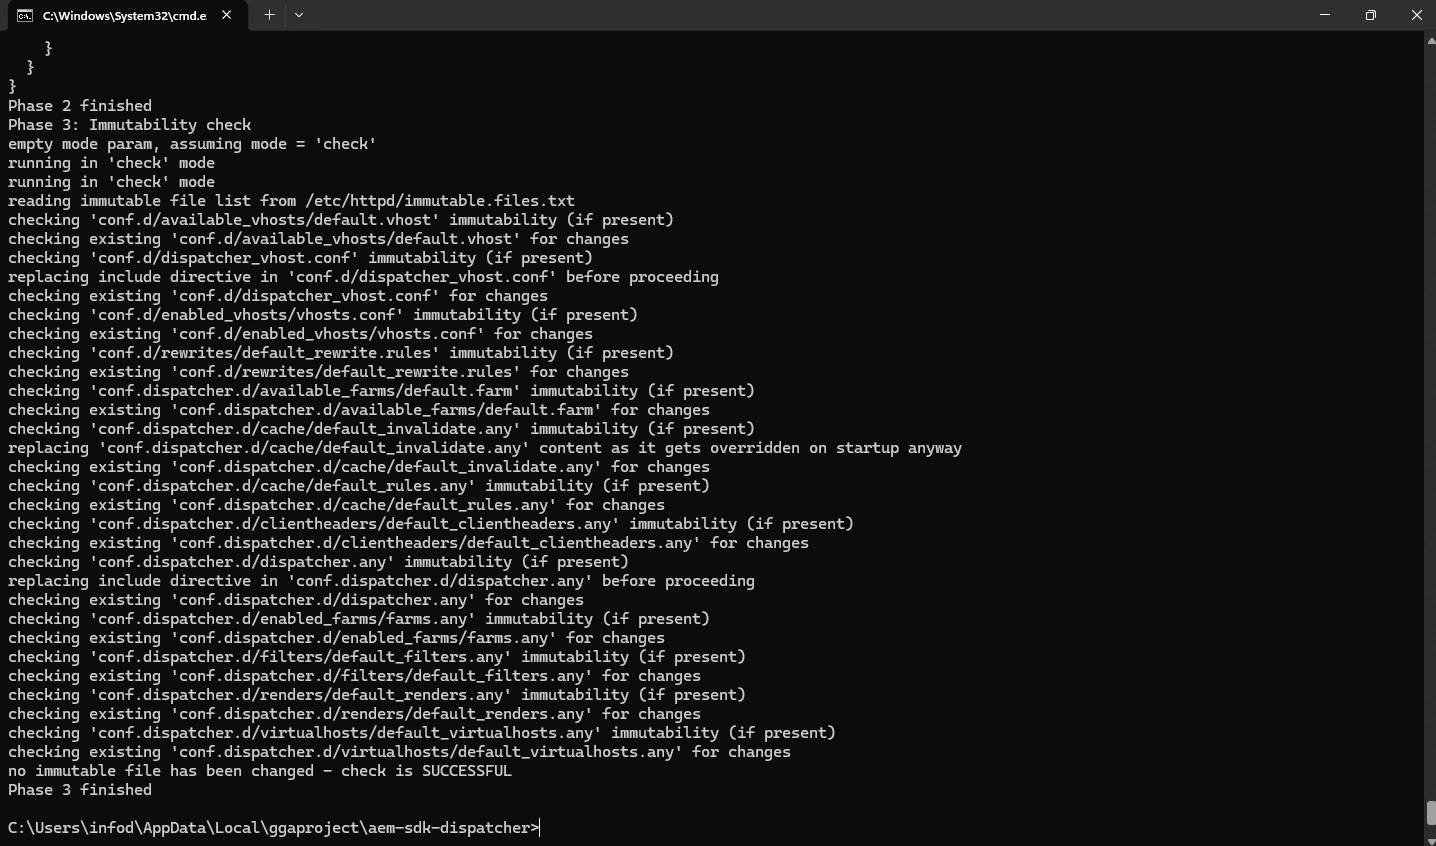
Start the Dispatcher:
-
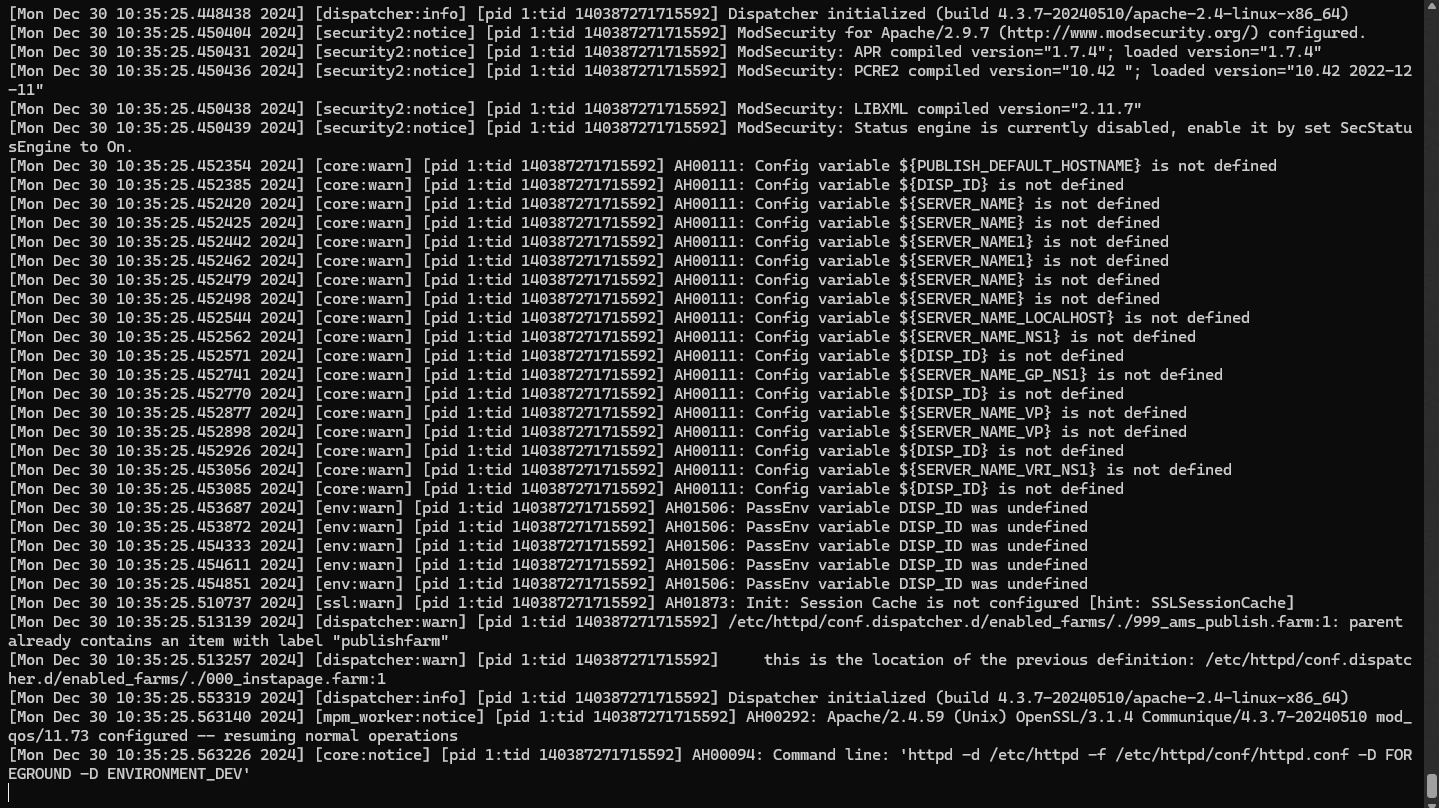
Now start the dispatcher in a docker image with a deployment information make sure you have up the AEM publish instance
-
With your AEM publish server running on windows running on port 4503 you can start the dispatcher by running the command
-
After running it looks like :
bin\docker_run src host.docker.internal:4503 8080