Blogs > Content Transfer Tool (CTT) Overview: Migrating Content to AEM as a Cloud Service
AEM Sites
Content Transfer Tool (CTT) Overview: Migrating Content to AEM as a Cloud Service
September 14, 2024If you're planning to migrate your existing Adobe Experience Manager (AEM) content to AEM as a Cloud Service, the Content Transfer Tool (CTT) is your go-to solution. Developed by Adobe, this tool simplifies the migration process by enabling you to move content from an on-premise or AEM Managed Services (AMS) instance to AEM Cloud. In this, we’ll give you a straightforward overview of how the Content Transfer Tool works and why it’s essential for a smooth migration to the cloud.
What is the Content Transfer Tool (CTT)?
The Content Transfer Tool is designed to help you migrate content from a Source AEM instance (such as on-premise or AMS) to a Target AEM Cloud Service instance. Not only does it move your content, but it also transfers groups automatically, making the migration process more efficient. One of the best features of the CTT is that it integrates seamlessly with the Cloud Acceleration Manager, providing you with an enhanced migration experience.
Here’s why that matters:
-
Self-service extraction: Migrate content once and deploy it across multiple environments simultaneously.
-
User-friendly experience: The tool has helpful loading indicators, error handling, and guardrails to keep things running smoothly.
-
Persistent logs: You can always access ingestion logs for troubleshooting purposes.
-
Validation reports: You get detailed reports to verify that everything migrated successfully, including groups and user roles.
The Two Main Phases of Content Transfer
The migration process using CTT happens in two main phases: Extraction and Ingestion. Let’s break these down.
1. Extraction Phase
In the extraction phase, content is pulled from the source AEM instance and placed into a temporary cloud storage area called a migration set. Adobe provides this cloud storage space, and it's where your content will "live" while it’s transferred from your source instance to the cloud.
Key things to remember about the Extraction Phase:
-
Migration Set: A cloud storage area where the content is temporarily stored during migration.
-
Top-Up Feature: After the initial content extraction, you can transfer only the new changes made to the content since the last transfer, reducing the need for a complete content freeze.
2. Ingestion Phase
Once the content is in the migration set, the next step is ingesting it into the target AEM Cloud Service instance. This phase moves the content from the migration set into your cloud instance.
Key things to remember about the Ingestion Phase:
-
Delta Content Ingestion: Only new or changed content is applied during ingestion to avoid overwriting all your content.
-
Wipe Option: Disable this option to apply only the changes (delta content) on top of the existing content.
Attributes of a Migration Set
A migration set is a critical part of the CTT workflow. Here are the essential details you need to know:
-
Maximum Migration Sets: You can create up to 10 migration sets within a single project in Cloud Acceleration Manager.
-
Unique Naming: Each migration set must have a unique name for easy identification.
-
Differential Content Transfer: With the top-up feature, you only transfer the content changes made since the previous migration, helping you minimize downtime before going live.
Important: After the first big content transfer, Adobe recommends frequent differential content top-ups. This reduces the content freeze period during the final transfer before you go live on the AEM Cloud.
Migration Set Expiry
A migration set will expire after approximately 45 days of inactivity. But don’t worry, you’ll get plenty of warnings before this happens. You can extend the expiration by performing any of these actions:
-
Edit the description of the migration set.
-
Extract more content into it.
-
Ingest content from it.
You’ll also see visual indicators on the project card and in the migration job table, reminding you that a migration set is approaching expiration.
Prerequisites for Content Transfer Tool
The Content Transfer Tool facilitates migration to AEM, but certain conditions must be met for successful usage:
-
AEM Version: Supports AEM 6.3 or higher.
-
Segment Store Size: Handles repositories with fewer than 750 million JCR nodes and an online compacted size of up to 500 GB on Author and 50 GB on Publish. For larger sizes, consult Adobe Customer Care.
-
Repository Size: Supports up to 20 TB for File Data Store. Larger sizes are possible for Amazon S3 and Azure Data Stores. Pre-copy steps can speed up transfers.
-
Lucene Index Size: Total Lucene index size should not exceed 25 GB, excluding /oak:index/lucene and /oak:index/damAssetLucene.
-
Immutable Paths: Cannot migrate immutable paths directly. For specific paths like /etc, AEM Forms to AEM Forms as a Cloud Service is supported.
-
MongoDB Node Property Limit: MongoDB node property values must not exceed 16 MB. Run an oak-run script to identify and convert large property values to Binary if needed.
What’s Next?
Now that you have an understanding of the Content Transfer Tool (CTT) and how it can help move content from your existing AEM instance to AEM Cloud, it’s time to get started. Before diving into the tool, make sure to review the Prerequisites for Content Transfer Tool to ensure everything is in place for a smooth migration.
Step-by-Step Guide to Using the Content Transfer Tool (CTT) for AEM Migration
Best Practices Before Running CTT
-
Run revision cleanup or compaction on the source AEM instance to reduce the repository size.
-
Perform a data store consistency check using the oak-run jar to avoid any unexpected behavior.
-
Ensure there is enough free disk space on the source instance (at least 1.5 times the repository size) for temporary extraction.
Step 1: Installing the Content Transfer Tool
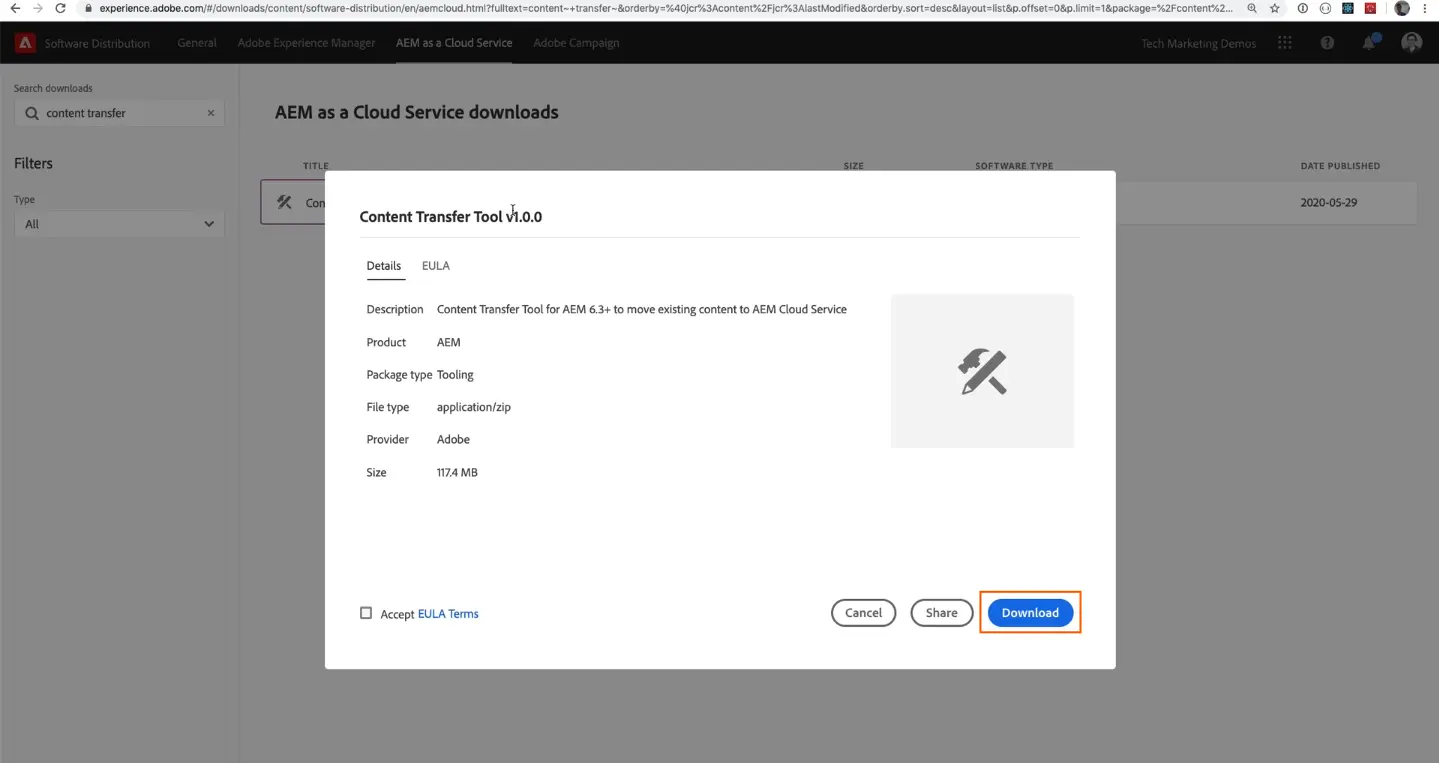
First, install the Content Transfer Tool on your AEM source instance (AEM 6.3 or higher). You can download this tool from the AEM Software Distribution Portal.
-
Go to the Software Distribution Portal and search for the Content Transfer Tool.
-
Download the tool and upload it to your AEM source instance using Package Manager.
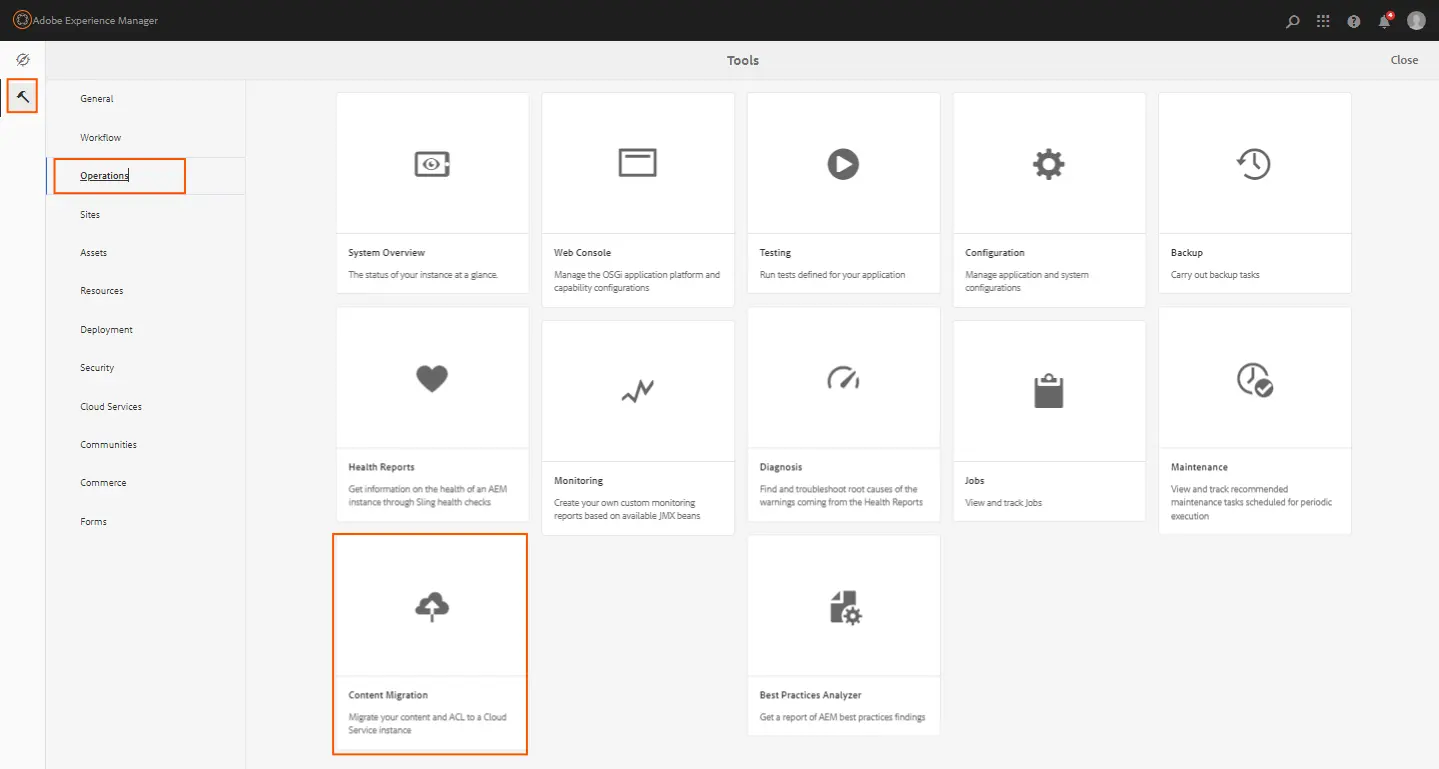
-
Once installed, you will see a new card for Content Transfer under tools > operations > content transfer on your AEM start screen.
Step 2: Retrieve your Access Token from the Cloud Service
To migrate content using the Content Transfer Tool (CTT), you will need to retrieve an Access Token from your AEM as a Cloud Service environment. This token is required to authenticate the migration set when uploading content from the source AEM instance.
Here’s how to retrieve your Access Token:
-
Login to your AEM as a Cloud Service Author instance using your admin credentials.
-
Once logged in, navigate to the following URL in your browser:
/libs/granite/migration/token.json
This will trigger the system to generate and display the Access Token
needed for the migration. -
The JSON response will appear on the screen, containing your Access Token.
The format of the JSON response will look like this:
{
"token": "your-access-token-string"
}
-
Copy the Access Token from the JSON response and save it securely for use in the migration process.
You’ll need to input this token when setting up your Migration Set in the Transfer Tool UI.
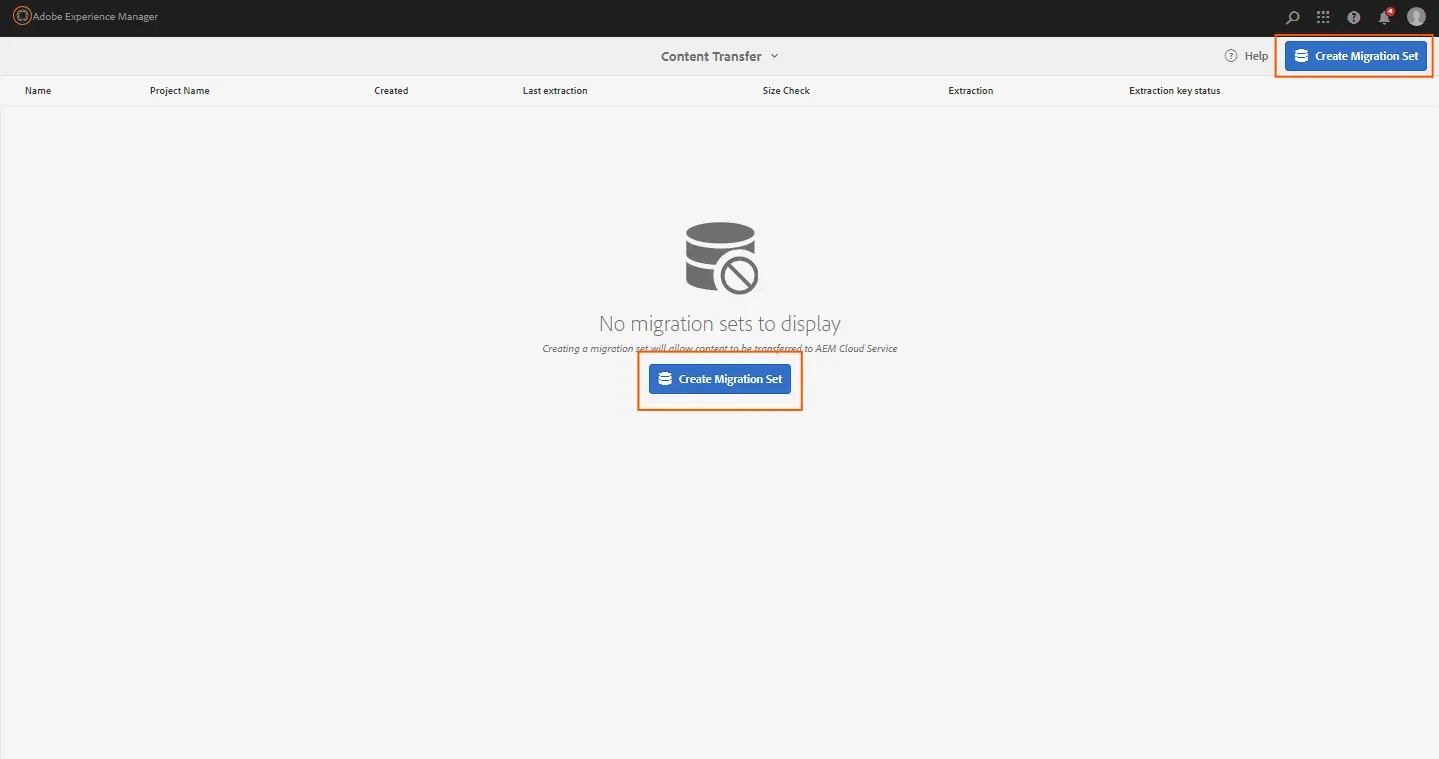
Step 3: Creating a Migration Set
The next step is to create a migration set. A migration set defines all the content (pages, digital assets, etc.) you wish to transfer.
-
Go to the Content Transfer Tool UI in AEM, and click Create New Migration Set.
-
Name your migration set (for example, “WKND Base Content”).
-
Enter the Cloud Service Destination URL. This is the URL of the AEM as a Cloud Service environment you want to migrate to.
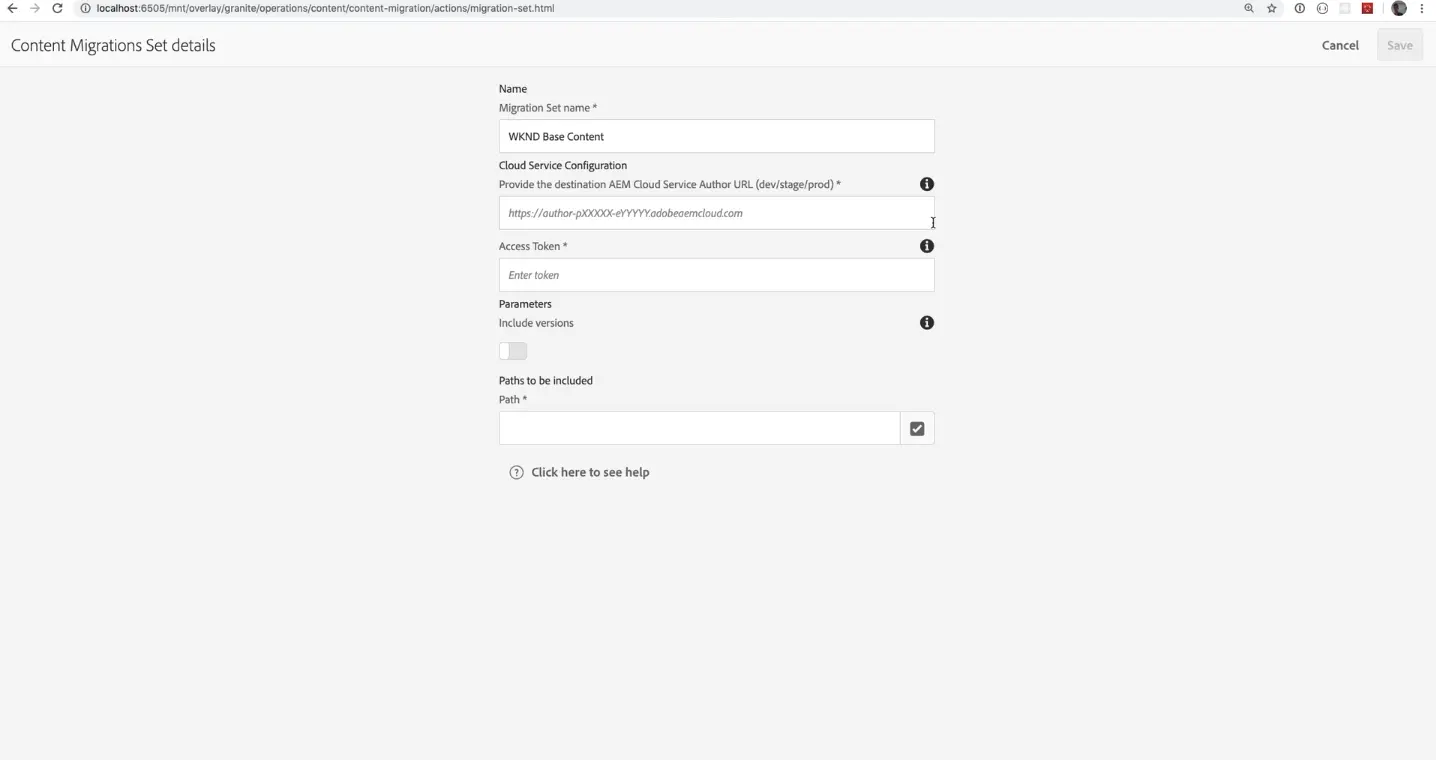
-
Enter the Retrieved Access Token from the cloud service by navigating to /libs/granite/migration/token.json.
-
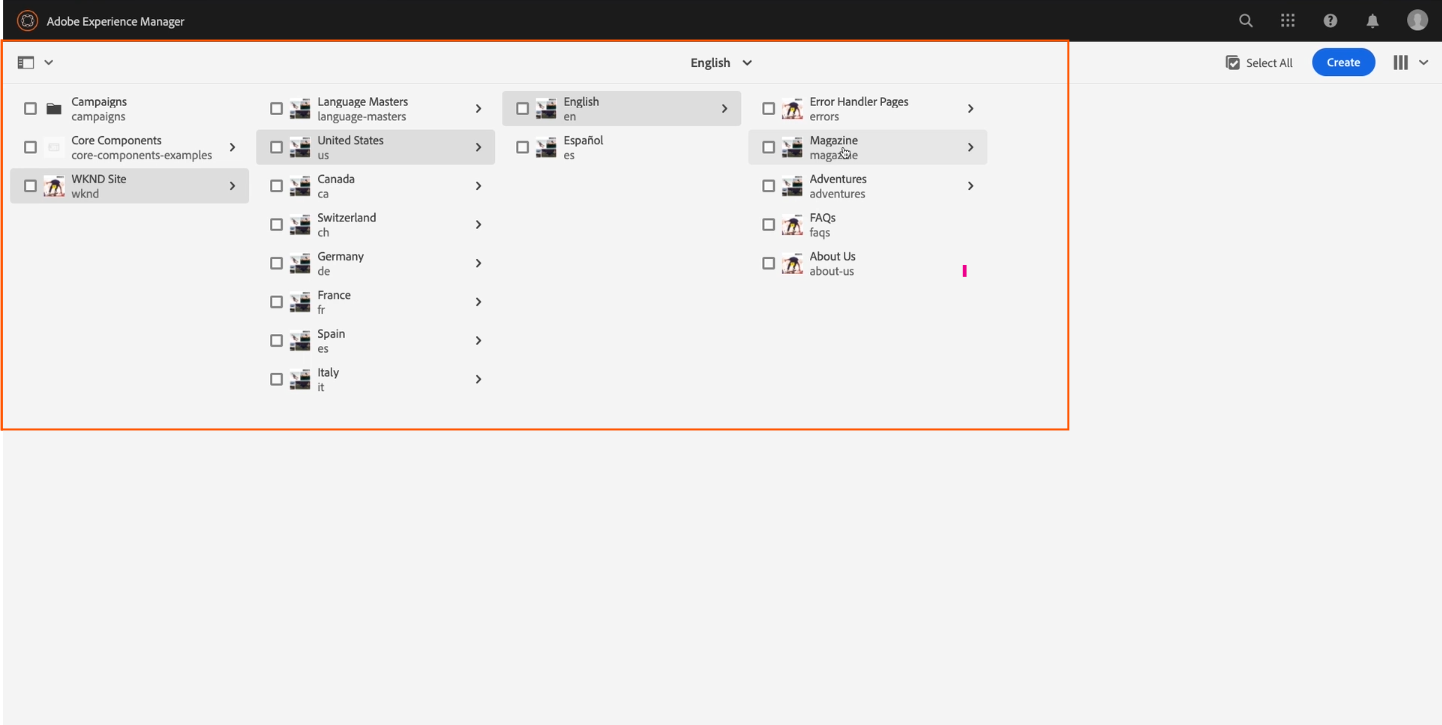
Choose which content paths to include in your migration set (e.g., /content/WKND, /conf/WKND, /assets/WKND).
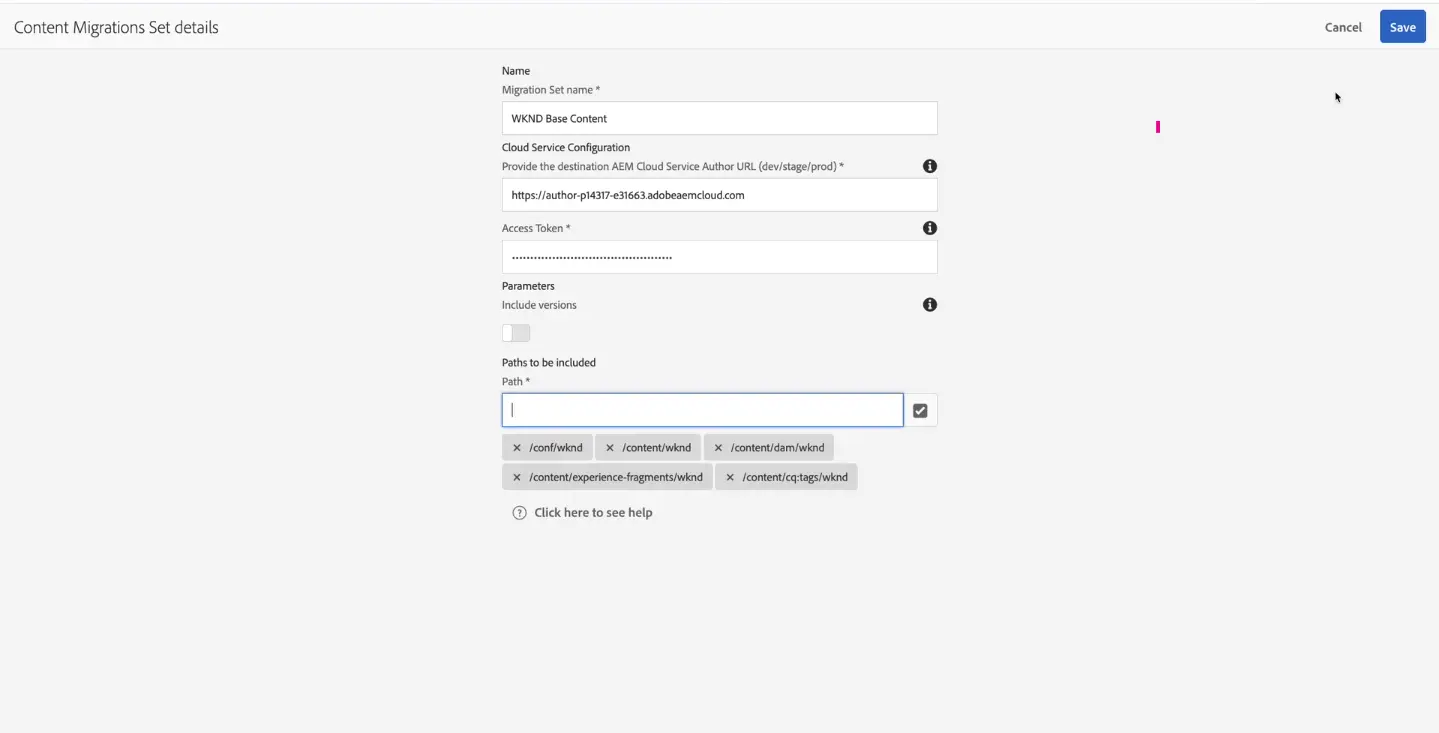
-
Save the migration set. After this, a new migration set will be created.
Step 4: Extraction Phase
Now it’s time to extract the content from your AEM source instance.
-
Select your migration set and click Extract.
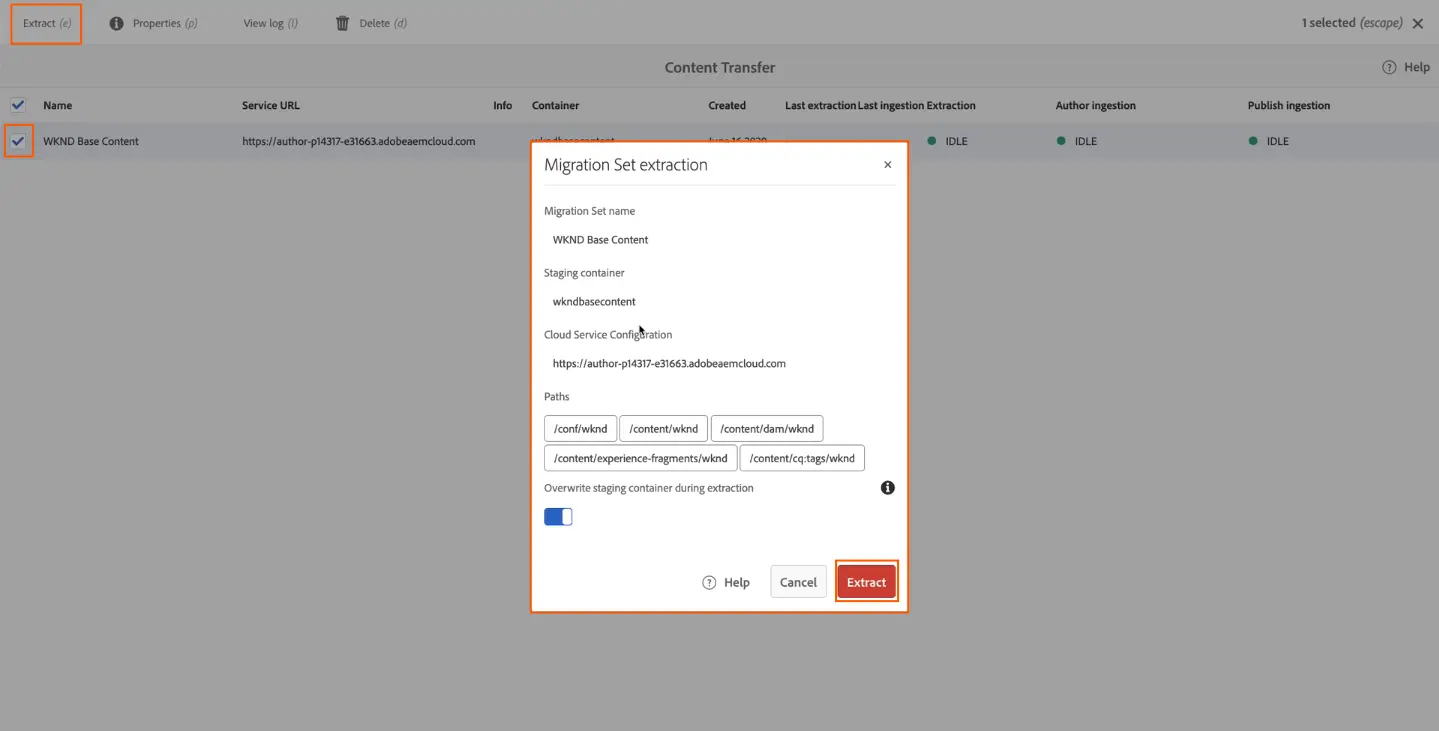


-
The extraction will pull the content from your source repository and upload it to Adobe-managed temporary cloud storage.
-
You can monitor the extraction by viewing the logs.
Step 5: Ingestion Phase
Once extraction is complete, the next step is to ingest the content into your AEM as a Cloud Service environment.
-
Select your migration set again and click Ingest.
-
Choose whether to wipe existing content on the target cloud instance. It’s recommended to wipe the target instance for the first migration to ensure a clean environment.
-
You can choose to ingest on the Author, Publish, or both environments.
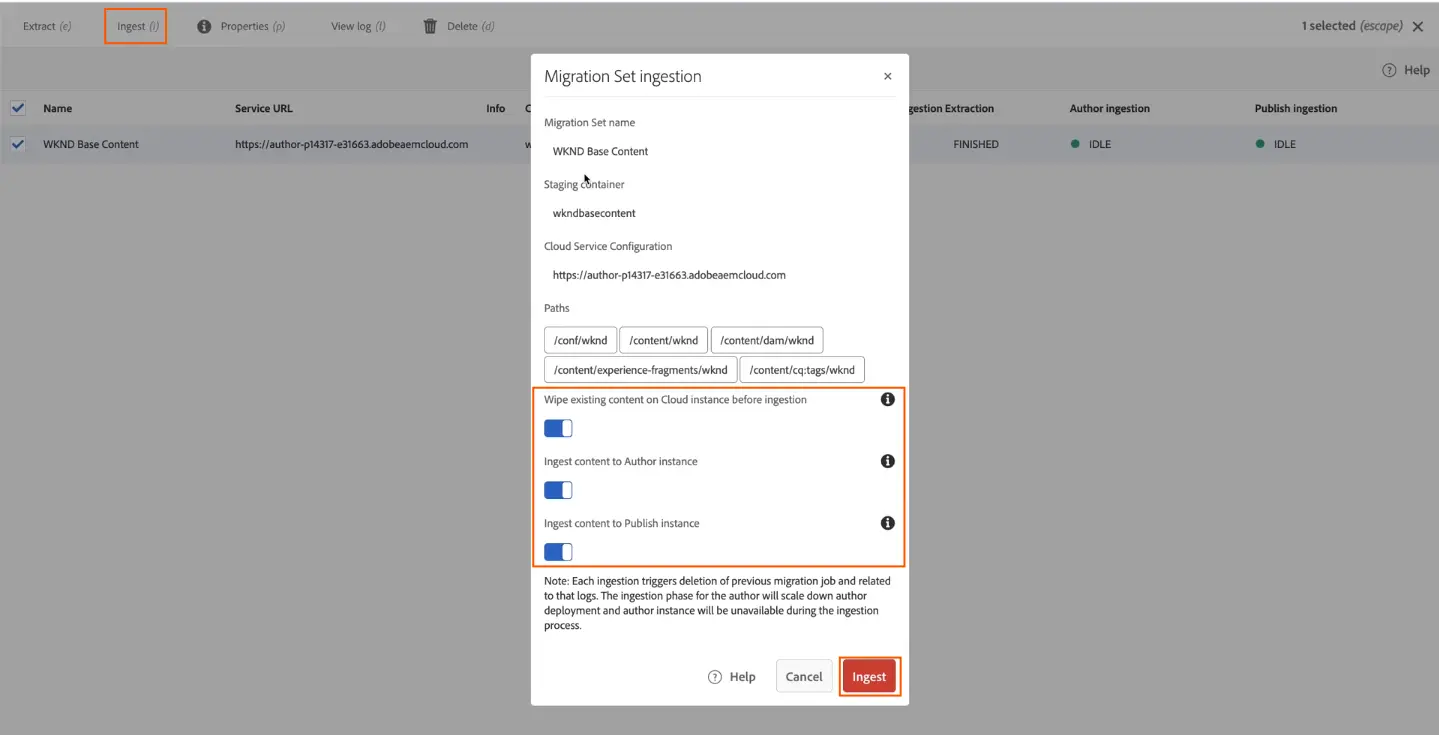
-
Click Ingest to start the process. You can monitor the ingestion progress in the logs.


Step 6: Verifying the Migration
Once the ingestion process is complete, log into your AEM as a Cloud Service environment to verify that all your content has been successfully transferred.
-
Navigate to Sites Console to check if all pages have been migrated.
-
Check Assets to ensure all digital files have been migrated.
Step 7: Top-up Migration (Delta Migration)
For ongoing projects, content might still be edited on the AEM source instance after the initial migration. The Content Transfer Tool allows you to perform Delta Migrations, where only newly added or changed content is migrated.
-
After creating new content (e.g., a new page), go to the Content Transfer Tool and select your migration set.
-
Click Extract, but this time, turn off the option to overwrite the staging container to preserve previously migrated content.
-
Perform the Ingestion as usual, and the new or updated content will be added to the AEM cloud environment.
-
Verify that the new content has been migrated by checking your Sites Console and Assets in the cloud.
Thank you for taking the time to explore this blog. I hope it provided valuable insights and enhanced your understanding of the topic.
Stay tuned for more informative content, and keep learning and growing! 😊