Blogs > Creating custom button & console in AEM
AEM Sites
Creating custom button and console in AEM
| August 9, 2023Adobe Experience Manager (AEM) is a comprehensive content management solution for building websites, mobile apps, and forms. AEM's flexibility allows developers to customize its interface extensively. In this blog, we'll walk through the steps to create a custom button in the AEM console and how to add a custom navigation tab and console.
Prerequisites
Before we start, ensure you have the following:
Running AEM instance (AEM 6.x)
Basic knowledge of AEM and Sling
Familiarity with JSP, and front-end technologies like HTML, CSS, Javascript
Creating a Custom Button in an AEM Console
In AEM, all the core content and components resides in the /libs directory in CRX. When customization or modification is required, it's best practice to overlay the specific node from /libs to the /apps directory. This approach ensures that the original content remains untouched, allowing for safer and more manageable updates. By overlaying and modifying nodes in /apps, you can tailor your AEM instance to meet unique requirements while maintaining a clear distinction between out-of-the-box functionality and custom development.
Let's create a custom button in the AEM Sites Console.
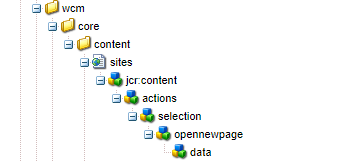
All related nodes for the Sites Console are located under /libs/wcm/core/content/sites. Within jcr:content, the /actions/selection node contains all the available buttons that appear when selecting any page in the Sites Console. To customize or add new functionality, we can overlay and modify any node as needed. In this scenario, we'll create a new button which will simply redirect us to a new page, on click of it. To do this, we'll overlay the /selection node under /apps and create a new node named "opennewpage" with a "data" sub-node and add respective properties to it as shown below.
/apps overlayed node structure

opennewpage node properties

data node properties

Save all the nodes & we've successfully customized the AEM Sites Console by adding a custom button.
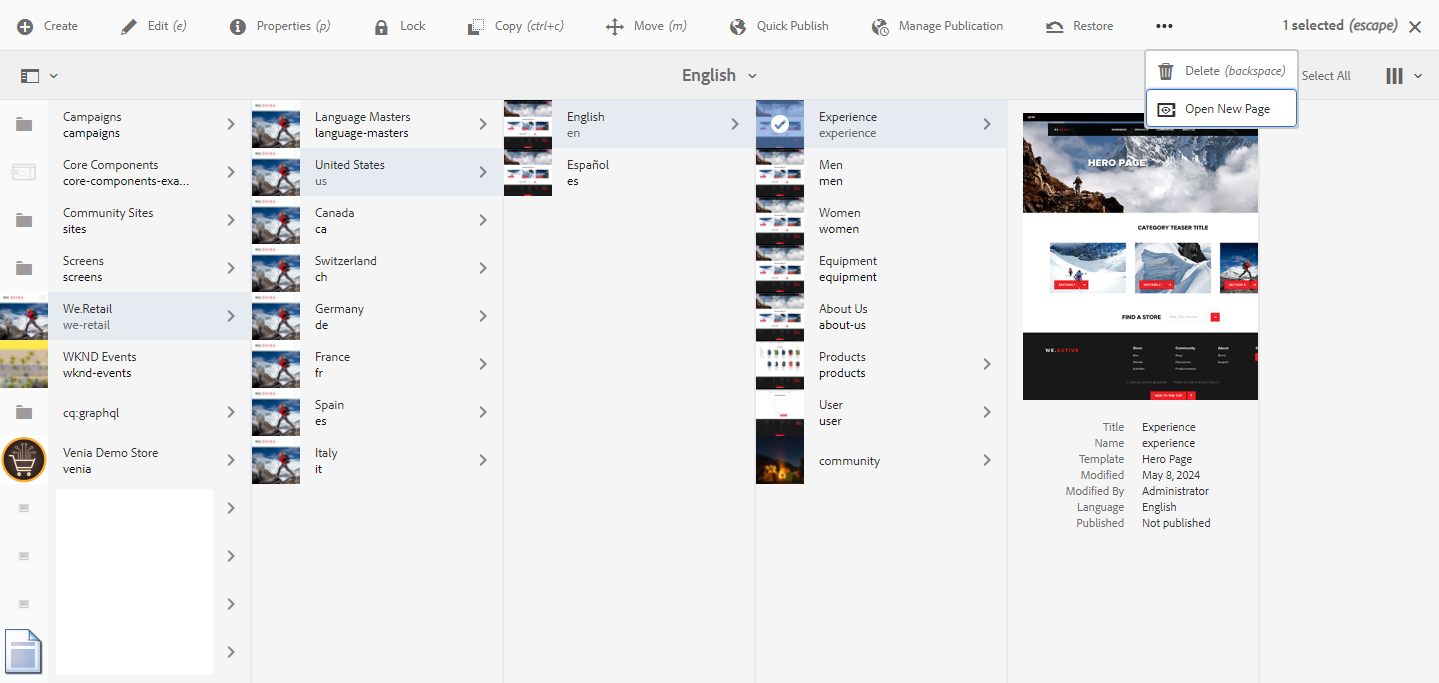
To check the availability of our custom button, navigate to the Sites Console at http://localhost:4502/sites.html/content, select any page, we'll spot our custom button in the selection bar (as shown below). Clicking on it will smoothly redirect us based on the URL specified in its data node's href property.

This slight adjustment enhances the console's usability, granting users a more fluid and user-friendly interaction.
Creating a Custom Tool Navigation Menu and a new Console
Now let's create a custom console in our AEM environment. To achieve this, we need to overlay the tools node from /libs/cq/core/content/nav/tools to /apps. Once overlaid, we can add our own navigation menu by creating a new node and configuring the necessary properties (as shown below).

After setting up the navigation menu, the next step is to add a subnode under our custom "console-menu" node. This subnode will represent the AEM console tool, which can be configured to perform any additional functionality we require. By creating this subnode and adding the respective properties according to our needs, we ensure the custom console tool is fully functional and integrated seamlessly into the AEM console.

We've configured the tool to redirect to the new console page located at /apps/[project]/content/sample-console.html. The next step involves creating this page. First, create a node of type cq:Page at the project level. This node should be assigned a meaningful title and the property sling:resourceType, which will reference the specific page component we plan to use.
sample-console page

sample-console node properties

jcr:content node properties

After establishing the cq:Page node, the next task is to develop the page component itself. This involves configuring the HTML and any associated scripts within the page component to display the desired content on our custom console. The page component's HTML should be crafted to present the necessary interface and functionality required for our console.
After creating the page component and adding the content & styling to it (can be done accordingly), we have sucessfully created our custom AEM console. Upon clicking our sample console tool, it effortlessly redirects us to the meticulously designed page we've created.

With that, we've successfully added a custom button to the AEM console, created a unique navigation menu, and personalized the AEM console itself. I hope you've found this blog helpful. Thanks for reading along! 😄


