Blogs > Dispatcher Setup and Configurations
Dispatcher
Dispatcher Setup and Configurations
| April 25, 2023I hope you all are doing well. Let's begin our learning with Dispatcher in AEM.
1. Introduction
Dispatcher is an Apache HTTP Web Server. It is used for exercising the functionalities such as caching, load balancing providing and limiting access of domains and security.
AEM publish instance cannot communicate with the dispatcher (web server) and so AEM module helps in the task. It conveys the requests of the dispatcher to the Publish instance and provides the response from the publish instance to the dispatcher back again.
First any request coming from the client goes to Content Delivery Network (CDN), if the response is available, is returned else it goes to Dispatcher where again the response availability is checked in cache. If found it is returned else it goes to the publish instance to fetch the response of the request and travels back the same route to serve the response to the client.
Here we are setting up Apache 2.2 – 32 bit and Dispatcher 4.2.1.
2. Setup For Dispatcher
- Download the provided version.
- After download, open file to install it. You will find the following dialog box, click on next.
- Accept the license and click on next and then you will find a Server Information dialog box. Add your respective network domain, server name and a working email address so that you get all the server related problems via email. Select the default port as 80 or else you can change it to 8000 for current user. Here the port is set to 80.
- Click on Next, select Typical and then click on Next again and you will find the default location of installed Apache Server in your system. You can either change it or keep it same.
- Then click on Next, the setup is almost completed, click on install. Installation takes about 5 minutes.
- After installation is complete click Finish.
- Now after completion of installation process we need to check whether everything is properly installed or not. Hit the URL http://localhost to find
- Now your dispatcher is installed and is ready to get configured. For configuration purpose you will be requiring disp_apache2.2.dll, dispatcher.any and httpd.conf files. It is recommended to get them from your workspace.
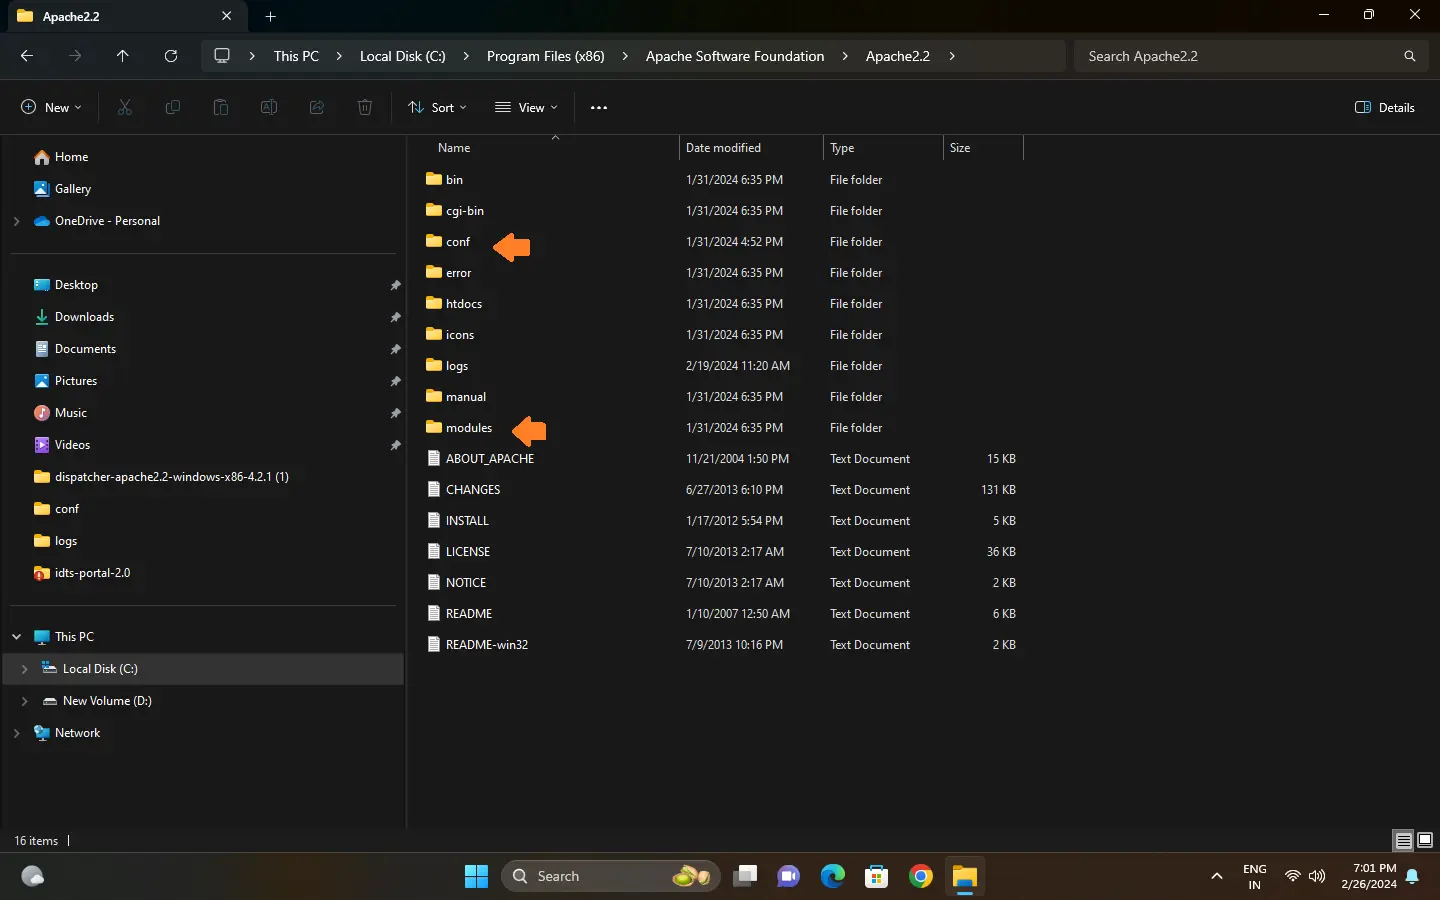
- Open the Apache and find modules folder. In modules folder paste disp_apache2.2.dll file. Then in conf folder paste dispatcher.any and httpd.conf files.
- httpd.conf file is the starting point of dispatcher so here you need to add LoadModule which is a DSO (Dynamically Shared Object). You need to provide entry of disp_apache2.2.dll file.
- In httpd.conf file you find your server root and administrator's email id which you added in server information dialog box.
- In IfModule provide location of dispatcher.any and also set the log level. In Directory add the handler and your httpd.conf file is ready.


3. Setup For Publish Instance
- In order to setup Publish instance copy the jar and license of AEM to a new folder and rename the jar to publish instance jar with required port number. By default it is 4503 but here we have set it to 4506.
- Then open command prompt and go to the directory where you have your jar and type java -jar cq-publish-4506.jar . This will open your publish instance with following run modes.
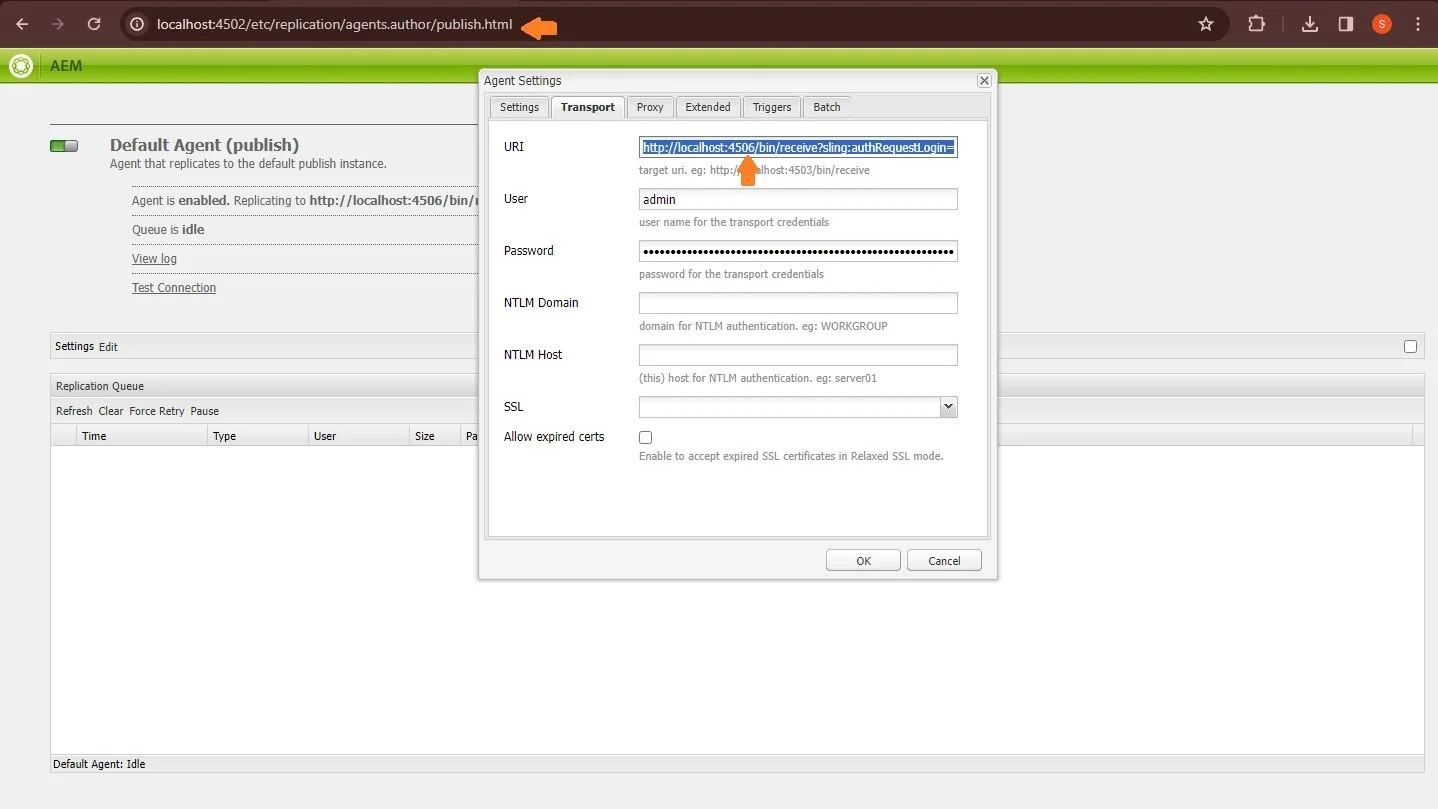
- Now we need to configure the port of publish instance in our author so go to author instance, then go to welcome page of author instance , find Replication options and select Agents on Author. Select Default Agent (publish) and edit.
- In Transport tab you will find the url, change the port to 4506.
- Now in publish instance, upload your project, acs commons and service pack and replicate them all from package manager console.
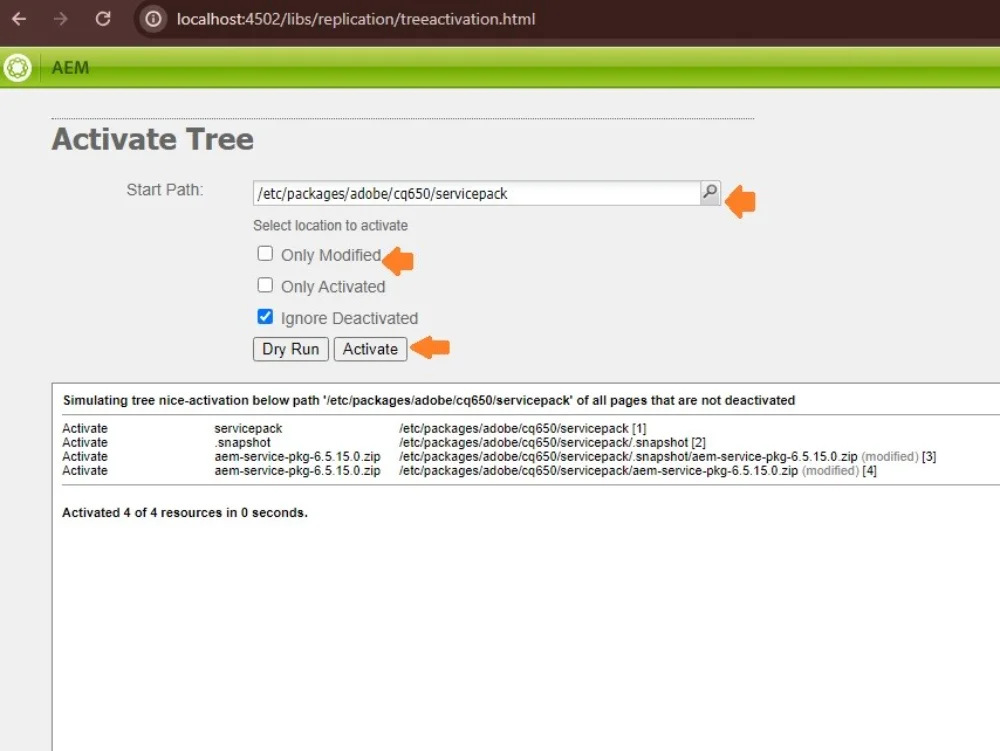
- Service pack may not get replicated from Package Manager Console properly. If so, go to Activate Tree and provide the path of your service pack in crx console and uncheck On Modify. First dry run and see if your service pack is ready to replicate and if yes, then click on Activate.
- Go to Felix console of publish instance and check whether all your bundles are Active or not once and if no then resolve the remaining dependencies which completes your publish instance setup.


4. dispatcher.any file
- dispatcher.any file determines complete behavior of your dispatcher.
- It has project specific /farms files (you can have single /farms file too, there is no restriction) where each farm file configures a set of load balanced renders.
- Set your publish instance as a render via setting its port and IP address.
- In /virtualhosts file we configure domains which are allowed in headers. Set your preferred domains here.
- /filter section sets the paths of requests that you want your dispatcher to handle. You can enable open consoles (crx content repository, OSGI console, servlet engines), non-public content directories (/bin, /content, /home and so on) and can also deny content grabbing.
- /cache section consists of a docroot file wherein the dispatcher will store files relative to this directory, decline the subsequent requests and allow the web server to deliver them as regular static content.
- /statfileslevel indicates the hierarchy up to which a .stat file gets created that checks the time of cache in the dispatcher and that of replication in publish environment. If time of modification in publish environment is greater than that of the cache then it means there is an updated version available and this will delete the previously generated cache and allow the entry of new cache in the provided level.
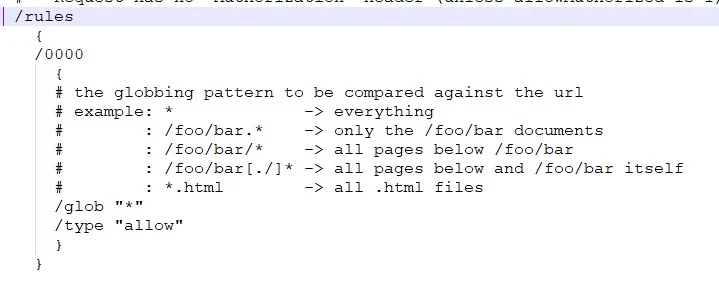
- In /rules section of /cache we have to specify how caching should happen according to the url generated. You can have your own rule sets.
- Within the cache section we have /invalidate wherein we define which request needs to be available for dispatcher flushing after activation. You can set the dispatcher flush agent on both Author as well as on Publish but prefer setting it on publish because author is a development environment and modifications are tend to happen whereas publish is a read-only environment where unusual modifications happen only via publishing the pages by author instance.
- Set the clients which can activate the content in /allowedClients section by providing the IP address and setting the /type “allow”.
- /ignoreUrlParams section allows you to ignore query parameters passed in the url while caching the response.
- Finally you can enable /auth_checker to check the whether the cached page which is requested for delivery matches its header with that of the one which is allowed via /filters by internally passing ‘?uri=’ parameter. If the status code becomes 200 then only the page is sent out for the delivery.


5. Publishing The Content And Checking On Dispatcher
- Simply go to your author instance and select the page that you want to publish and hit Quick Publish.
- Then go to your publish instance and check whether your published page is visible or not.
- Go to your dispatcher and type http://localhost/ complete path of your page and done.
6. Errors And Possible Solutions
- Service pack is not getting uploaded: replicate it in package manager and then use Activation tree from author instance to achieve the same.
- Bundle is not getting uploaded: Try force upload of snapshot of your project from packageManager(zip) or upload extracted snapshot from Felix console (do not forget to check start bundle) or (least recommended) change the port of your project’s pom.xml file to 4506 from 4503 and do single package.
- Socket Error: Recheck your IP address in Allowed Clients section.
- Null Pointer Exception: Agents on Author, Publish Queue might not be idle.
- Problem in triggering the jar of publish instance: rename the quickstart file to crx-quickstart-old. Abort the starting process of from command prompt and rerun java -jar cq-publish-4506.jar. You will find a new quickstart file now which gets generated with respective script.
I hope you find this blog informative, please share and for more blogs please surf our website.
Thank you


