Blogs > How to Add Custom Functions in Rule Editor
AEM Forms
How to Add Custom Functions in Rule Editor
| March 15, 2023Adobe Experience Manager (AEM) Forms provides a powerful rule editor that allows you to create dynamic and interactive forms. By adding custom JavaScript functions, you can extend the functionality of your forms and create more sophisticated logic. In this blog, we’ll walk through the steps to add custom functions to the rule editor.
Prerequisites :
Before we begin, make sure you have access to AEM Forms and are familiar with basic AEM concepts.
Understanding the Rule Editor:
Before diving into adding custom functions, it is essential to understand the Rule Editor's role in AEM Forms. The Rule Editor enables form designers to create rules based on conditions and actions, facilitating dynamic form behavior. These rules can be applied to form fields, buttons, and other elements to control visibility, enable/disable features, validate data, and more.
Need for Custom Functions:
While AEM Forms offers a comprehensive set of built-in functions, there are situations where you may require additional functionality specific to your organization's requirements. These could include complex calculations, data manipulation, integration with external systems, or specialized validation rules. Custom functions allow you to extend the Rule Editor's capabilities to address these needs.
Steps to Add Custom Functions :
Step 1:
-
Login to CRXDE and navigate to the apps folder.
Step 2:
-
Create a new folder under the apps folder, let’s call it customfunction-in-forms (you can choose any name you like). Then save your changes.
Step 3:
Create client libraries
Within the customfuction-in-forms folder, create a new node of type cq:ClientLibraryFolder called clientlibs.
Set the properties for the clientlibs folder by adding the following
-
allowProxy: Set to true.
-
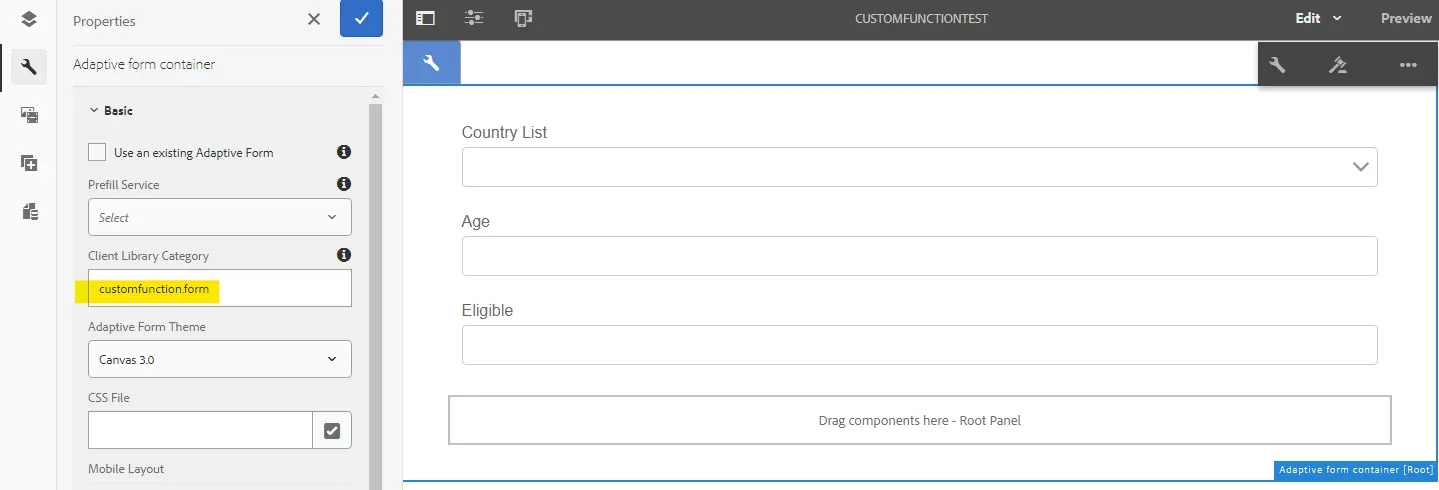
categories: Specify relevant categories (e.g., customfunction.form).
-

Step 4:
Structure your files:
-
Create a folder called js under the clientlibs folder.
-
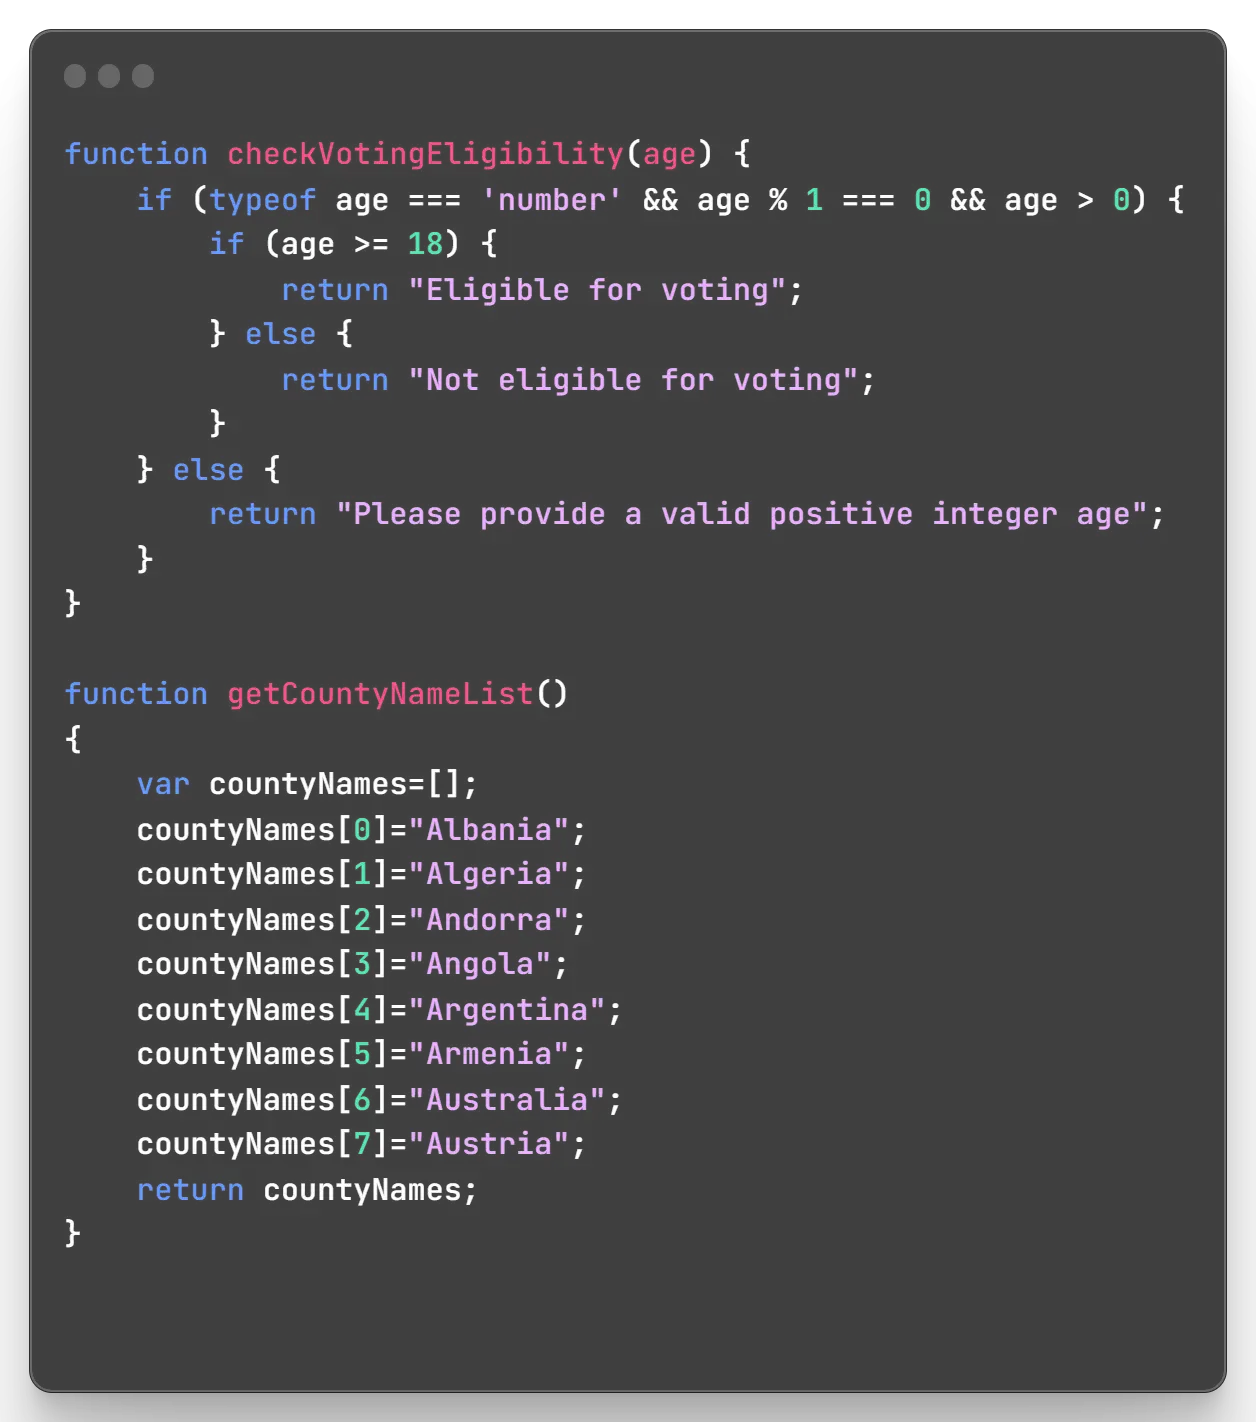
Within the js folder, create a file named customfunction.js.
-
Create another file named js.txt under the clientlibs folder and add entry of your js file

-
add below code in customfunction.js file
Step 5:
-
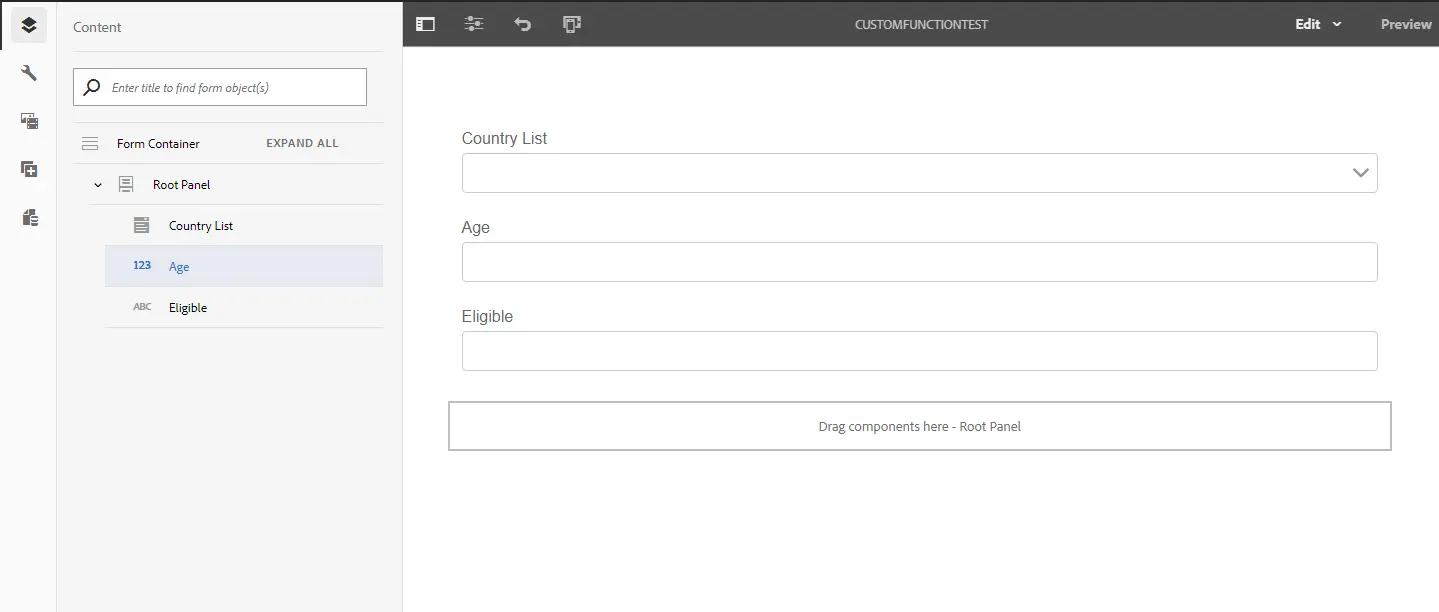
Create adaptive form with three fields drop down list , number and text field
Step 6:
-
Add clientlibs category in root panel(Adaptive form container) properties.
Step 7:
-
Go to Rule Editor of dropdown list.
-
Click on plus icon to create a rule.
-
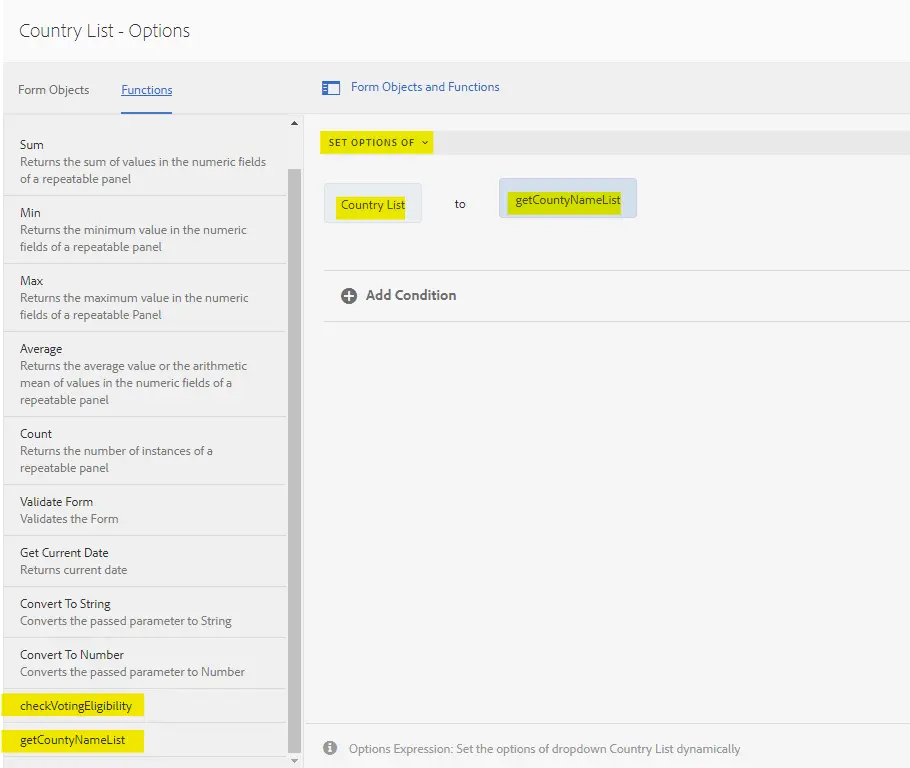
You can see your function in left side after clicking functions tab.
Step 8:
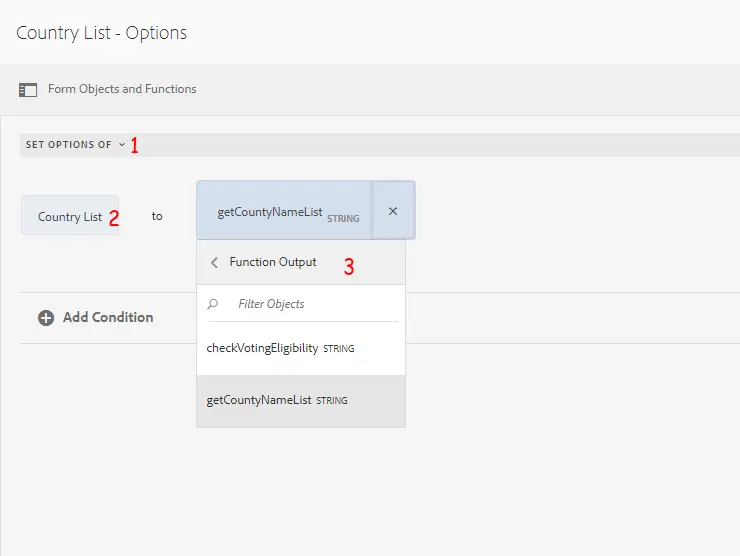
Click on dropdown and select [SET OPTIONS OF].
Select your object
Select function output
select your function
Save your changes.
Step 9:
-
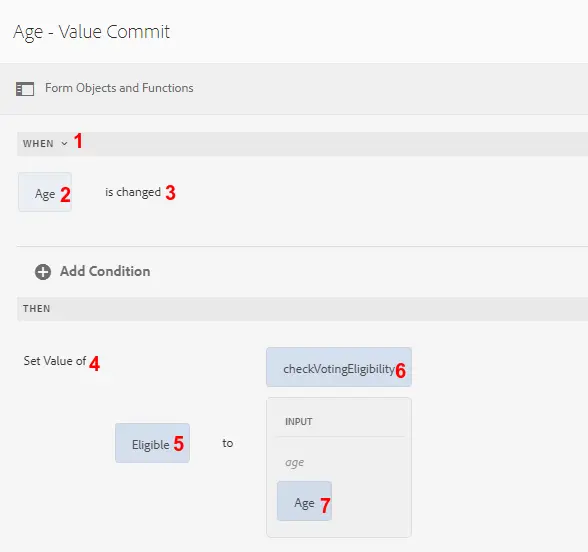
Same thing you need to do for age field, you can refer the image below.
-
Follow the steps that are mentioned below.
-
Save your changes.
Step 10:
-
Rules are defined now we need to test the form.


