Blogs > Sending Email on Submission of Adaptive Form
AEM Forms
Sending Email on Submission of Adaptive Form
January 31, 2023This blog aims to guide you through the process of setting up email notifications upon submitting an adaptive form. When users submit an adaptive form, it's essential to acknowledge their submission promptly. By setting up email notifications, you can ensure users receive confirmation and administrators stay informed. A common practice after receiving a submission through an Adaptive Form is to send a confirmation email to the submitter. To set this up, we'll choose the "Send Email" option as the submit action.
Email Submission Methods
Methods to submit the form via email:
Through an SMTP Server.
For testing purposes, we utilize a Fake SMTP Server. Here's how to set it up:
-
Download the Fake SMTP Server by searching for it on Google.
-
Find a reliable source and download the Fake SMTP Server software.
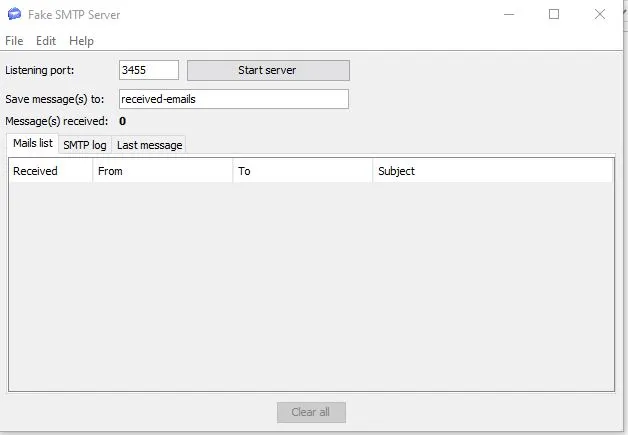
Configuration Needed
Before we begin, we need to configure mail services by navigating to the Felix Configuration Manager in your browser. The below screenshot shows you the configuration properties for Adobe mail server.
Configure your Email Configuration

In your Day CQ Mail Service, add your hostname (which may be localhost) and set the server port according to your server specifications. Then, provide a username and password, and specify the email address to be used in the "From:" field of messages sent by the mailer.
Create an Adaptive Form
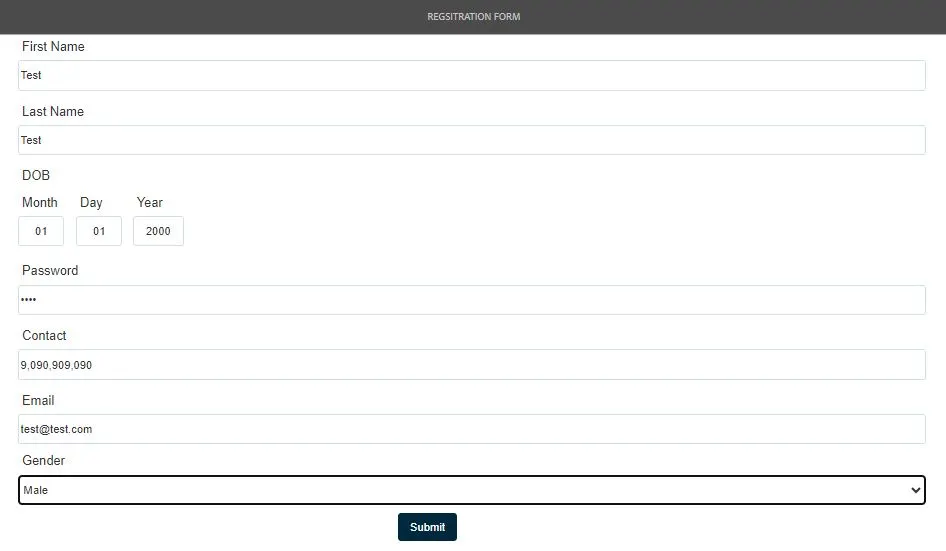
After completing the configuration, it's time to create an Adaptive Form. Simply design a form according to your requirements. We've created a registration form.
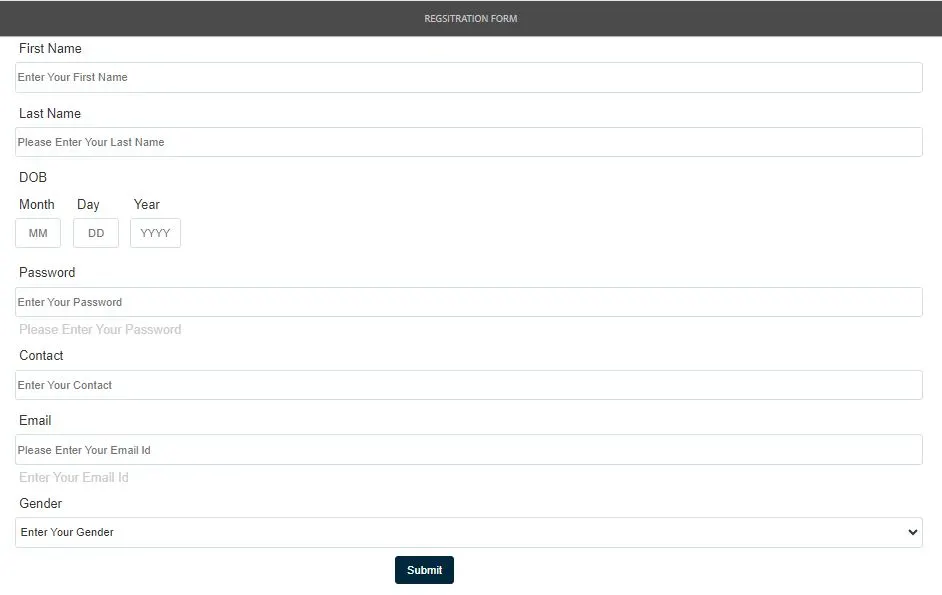
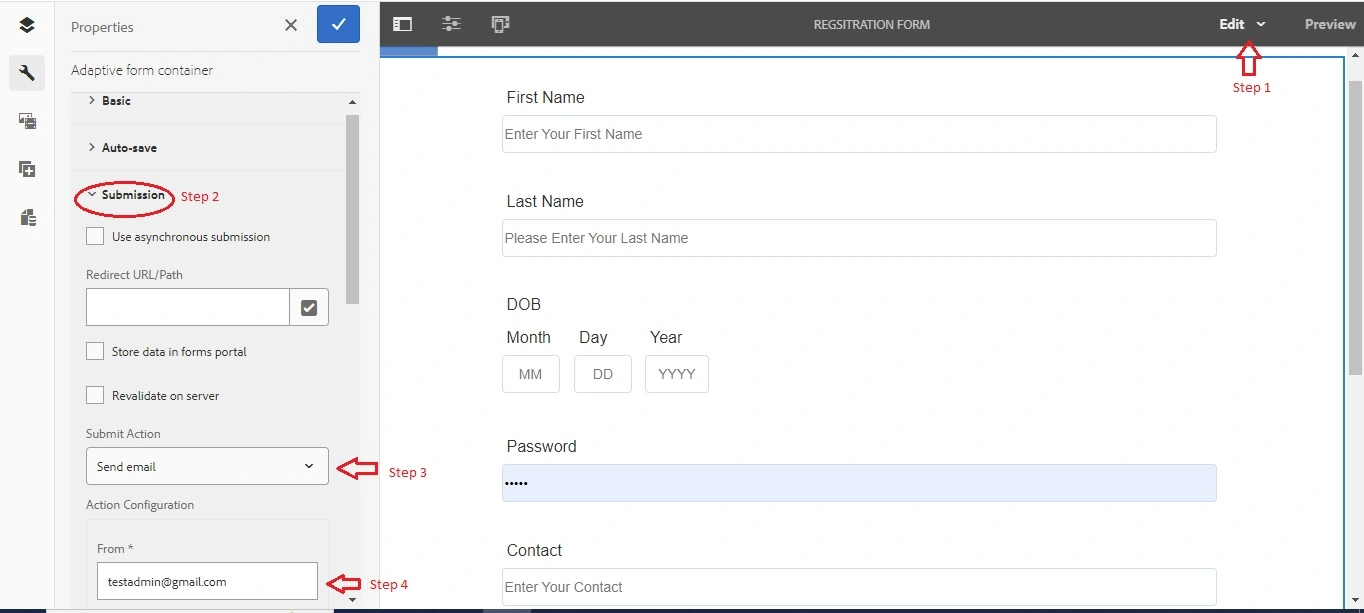
Now configure the form properties to enable submission and receive email notifications. Follow the below steps:
Navigate to the form and select 'Edit.'
Choose the submission properties.
Select 'Send Email' as the submit action.
In the Action Configuration, input your email address in the 'From' section as specified in the configuration settings.
In the 'To' section, enter ${email} to dynamically capture the recipient's email address.
Provide a suitable subject in the 'Subject' section, such as '${firstName} Form Submission,' ensuring personalization.
Save it
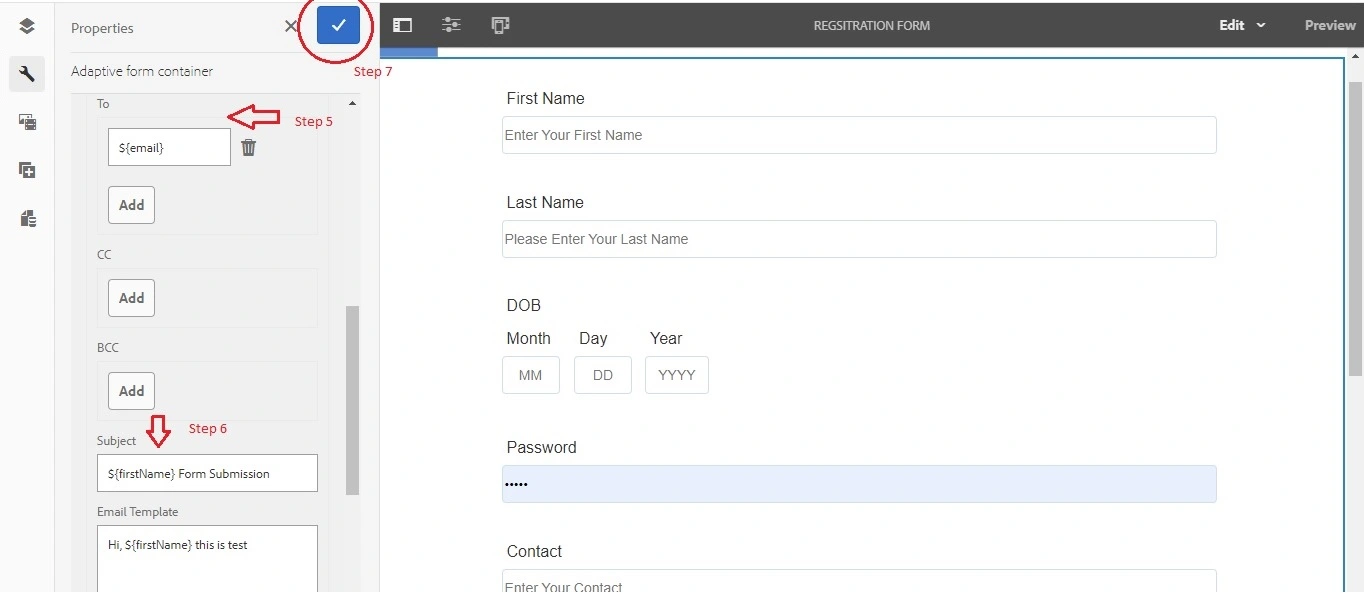
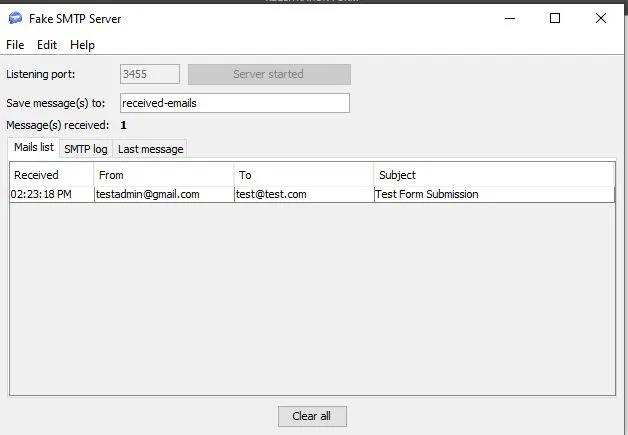
In the subject, I've included ${firstName} Form Submission. This means that the "firstName" corresponds to the name property of the First Name textbox. After receiving the email, you'll see the user's first name in the subject line. Once all properties are configured, start your fake SMTP server and submit the form.
I'm glad you found this article interesting and informative! Feel free to share it with your friends to spread the
knowledge.
Don't forget to follow me for upcoming blogs. Thank you!


