Blogs > Enhancing Security with SMS Two Factor Authentication in AEM Forms
AEM Forms
Enhancing Security with SMS Two Factor Authentication in AEM Forms
June 24, 2023SMS Two-Factor Authentication
In today's digital landscape, security is paramount. With cyber threats evolving constantly, safeguarding user accounts has become a top priority for businesses and individuals alike. One effective way to enhance security is through SMS-based two-factor authentication (2FA), a robust method that adds an extra layer of protection to online accounts. Let's delve into how SMS 2FA works and why it's a crucial tool in the fight against unauthorized access.
SMS 2FA adds an extra layer of security by requiring users to verify their identity not only with a password but also with a unique verification code sent to their mobile devices. This blog post dives into the process of implementing SMS 2FA with AEM Forms and highlights its benefits.
Create Developer Account
Many organizations offer SMS 2FA services, and if they have clear REST APIs, you can integrate them with AEM Forms effortlessly. In this tutorial, I've chosen Vonage API to show how SMS 2FA works with AEM Forms.
Begin by creating a developer account on the Vonage API platform. Once you've registered, take note of the API Key and API Secret Key provided by Vonage API Dashboard. These keys are crucial for accessing and using Vonage API's REST APIs effectively.
Create a Swagger File
Creating a Swagger file involves defining your API's structure, endpoints, parameters, responses, and other details using the Swagger/OpenAPI Specification. Here's a step-by-step guide to help you create a Swagger file:
Understand Swagger/OpenAPI Specification
Choose a Swagger Editor
Define API Info
Define Paths and Operations
Define Parameters and Responses
Add Security Definitions (if needed)
Export and Save
Validate and Test
Use tools like Swagger Inspector or Postman to validate and test your Swagger file against your actual API endpoints.
							swagger: '2.0'

							info:

  							version: 1.0.0

 							title: Nexmo Verify API

  							description: API for verifying OTP codes and sending SMS with codes using Nexmo (formerly Vonage)

							host: api.nexmo.com

							basePath: /verify

							schemes:

  							- https

							paths:

  							/check/json:

    						post:

      						summary: Verify OTP Code

      						produces:

        					- application/json

      						consumes:

        					- application/x-www-form-urlencoded

      						operationId: VerifyOTPCode

      						parameters:

        					- in: formData

          					name: api_key

          					type: string

          					description: API Key

        					- in: formData

         					name: api_secret

          					type: string

          					description: API Secret Key

        					- in: formData

          					name: request_id

          					type: string

          					description: Vonage Request ID

        					- in: formData

          					name: code

          					type: string

          					description: OTP Code

      						responses:

        					'200':

          					description: Successful Response

          					schema:

            				$ref: '#/definitions/ReturnValue'

  							/json:

    						post:

      						summary: Send SMS with Code

      						produces:

        					- application/json

      						consumes:

       		 				- application/x-www-form-urlencoded

      						operationId: SendSMSWithCode

      						parameters:

        					- in: formData

          					name: api_key

          					type: string

          					description: API Key

        					- in: formData

          					name: api_secret

          					type: string

          					description: API Secret Key

        					- in: formData

          					name: number

          					type: string

          					description: Number to send SMS

        					- in: formData

          					name: brand

          					type: string

          					description: Vonage Brand

        					- in: formData

          					name: code_length

          					type: string

          					description: Verification Code Length

      						responses:

        					'200':

          					description: Successful Response

          					schema:

            				$ref: '#/definitions/ReturnValue'


							definitions:

  							ReturnValue:

    						type: object

    						properties:

      						request_id:

        					type: string

      						status:

        					type: string
Create a Data Source
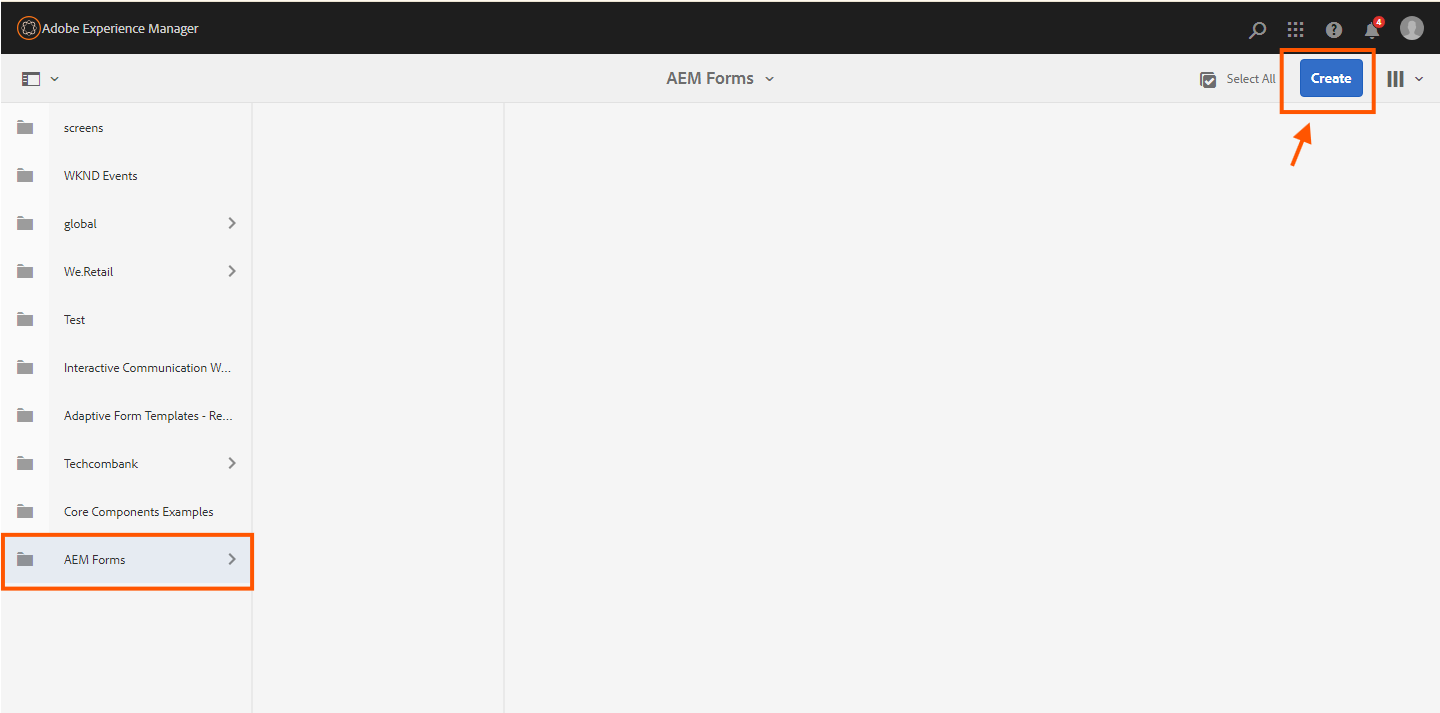
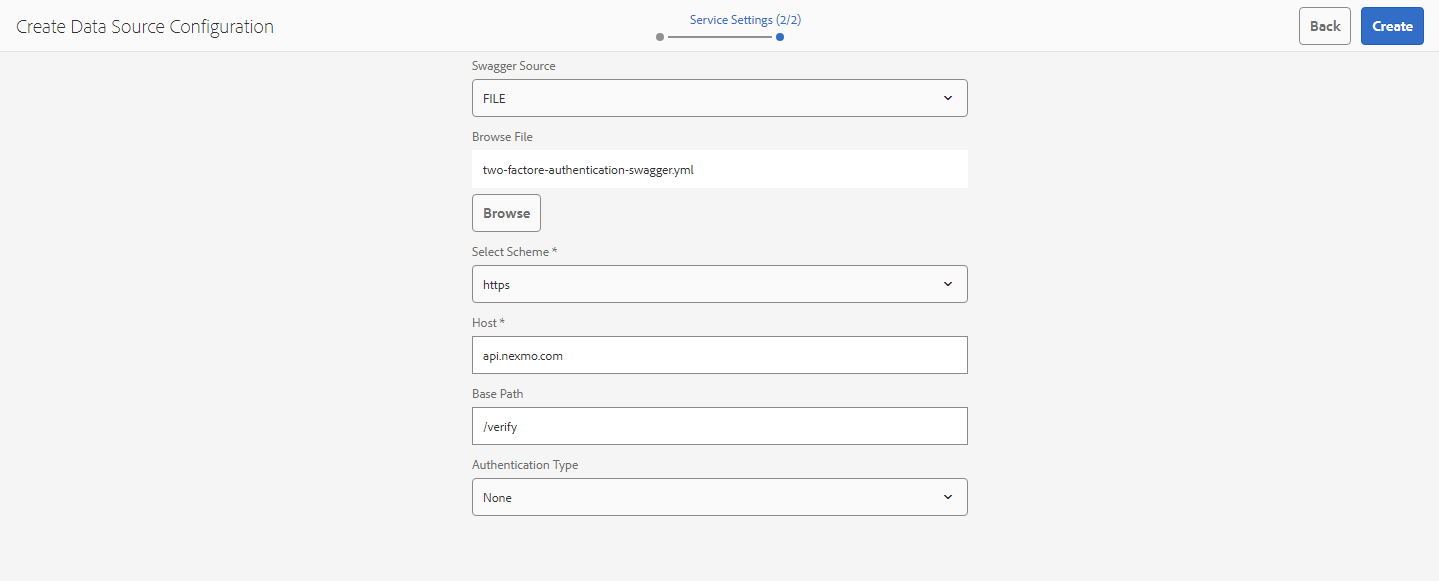
To connect AEM/AEM Forms with third party api's, you first make a data source in cloud services. You can use the Swagger file to set up this data source.
Log in to AEM and go to the Dashboard.
From Tools, select Cloud Services.
Pick or create a folder in Cloud Services to store your data sources.
Define settings like data type, endpoint URL, and authentication.
Save the data source

Create a Form Data Model
Creating a form data model in AEM Forms involves defining the structure of your form data, including the fields, data types, and validation rules. Here's a step-by-step guide:

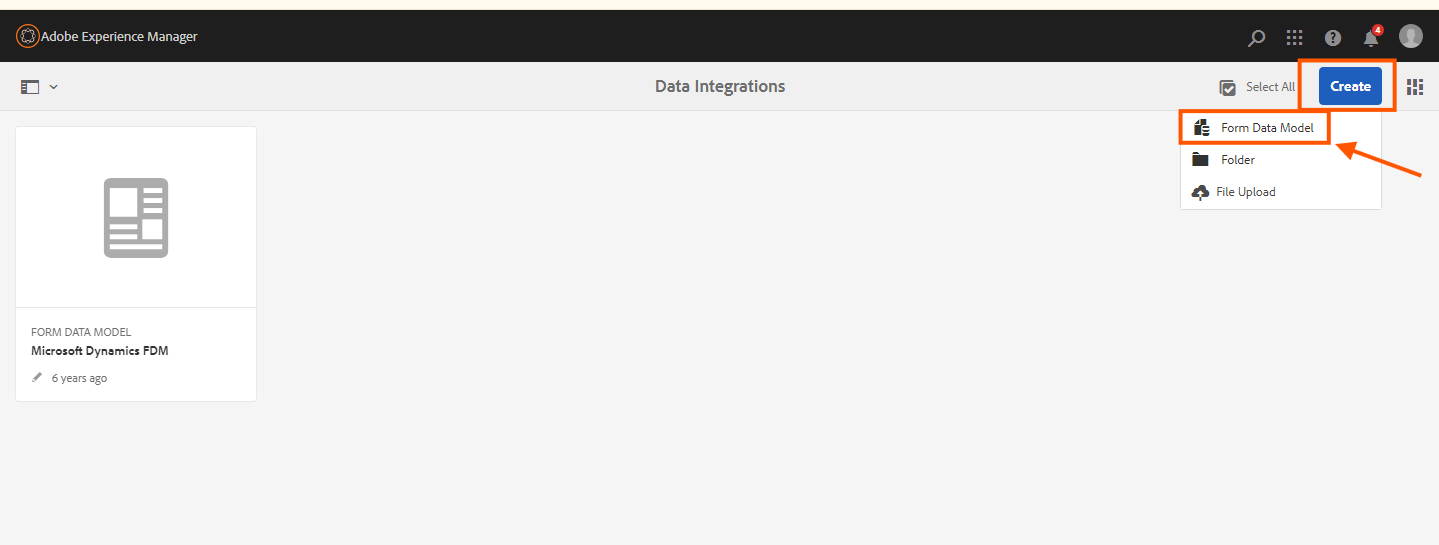
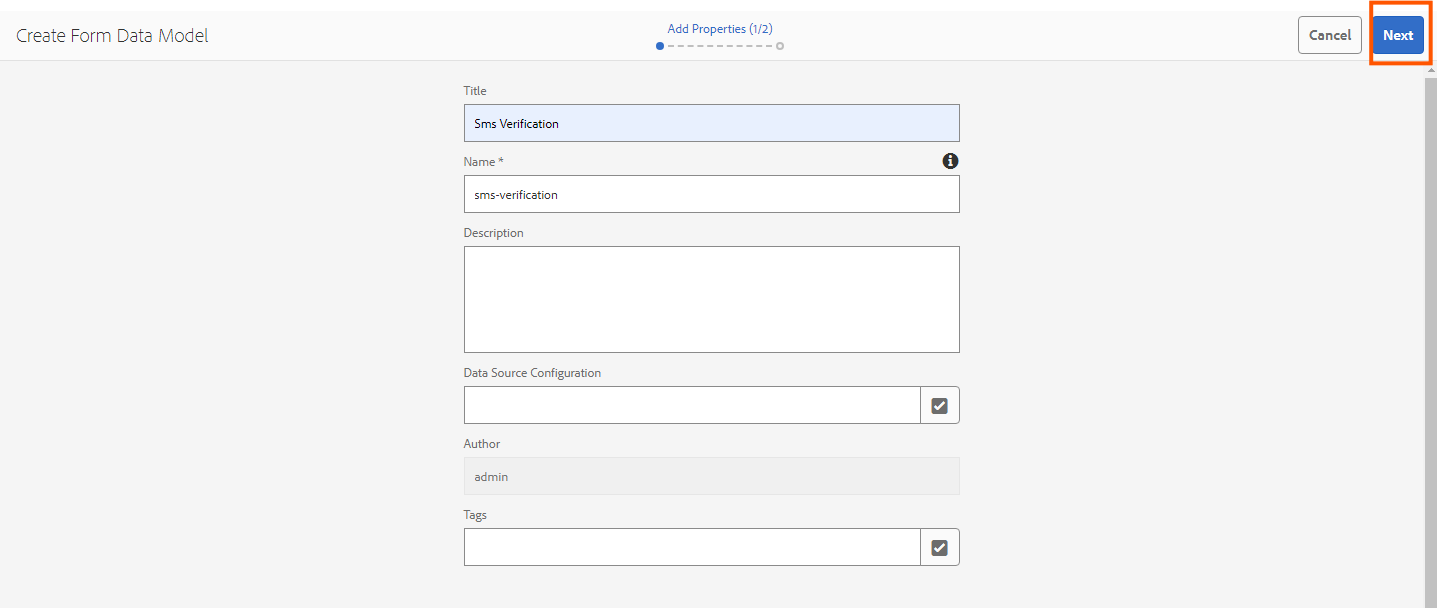
Select you data source
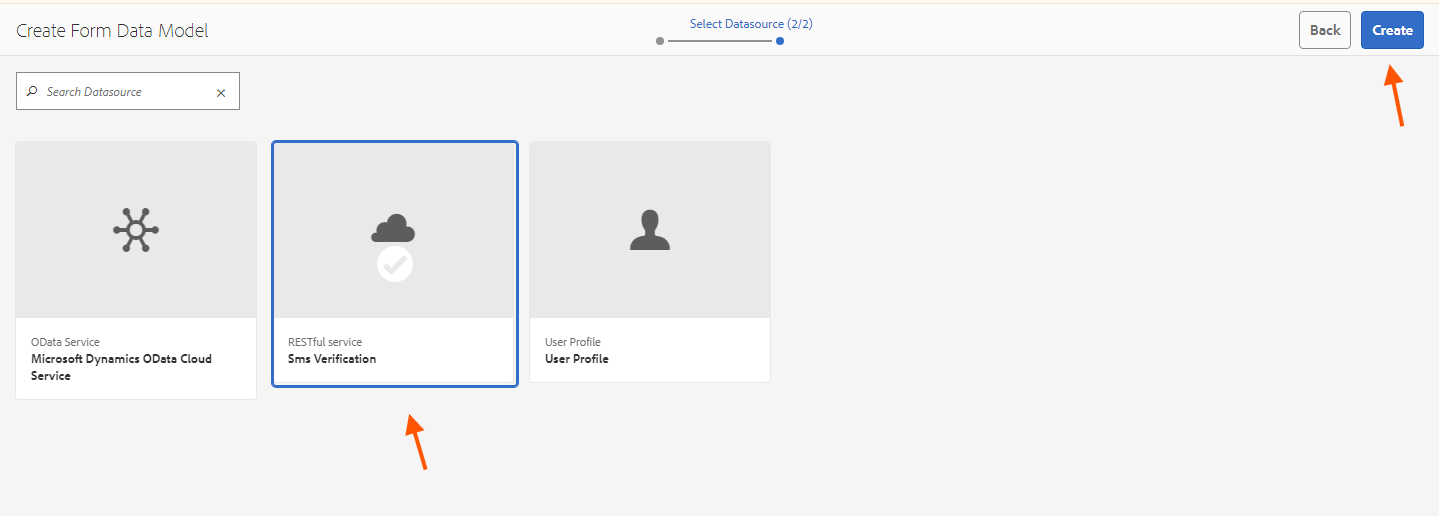
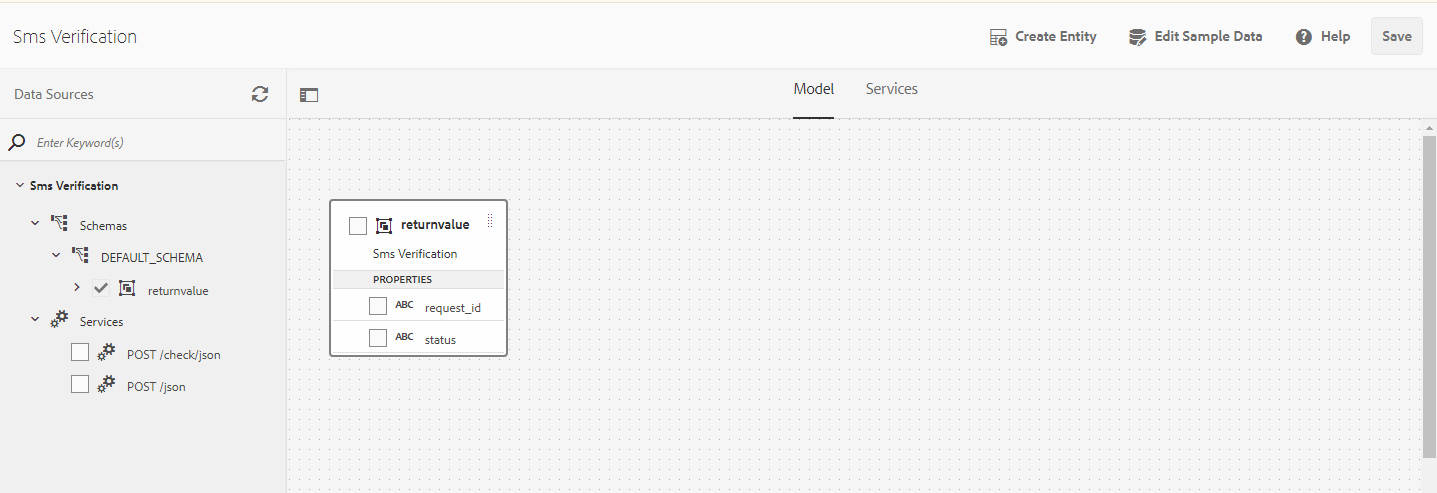
Test your Model and Service and save it.
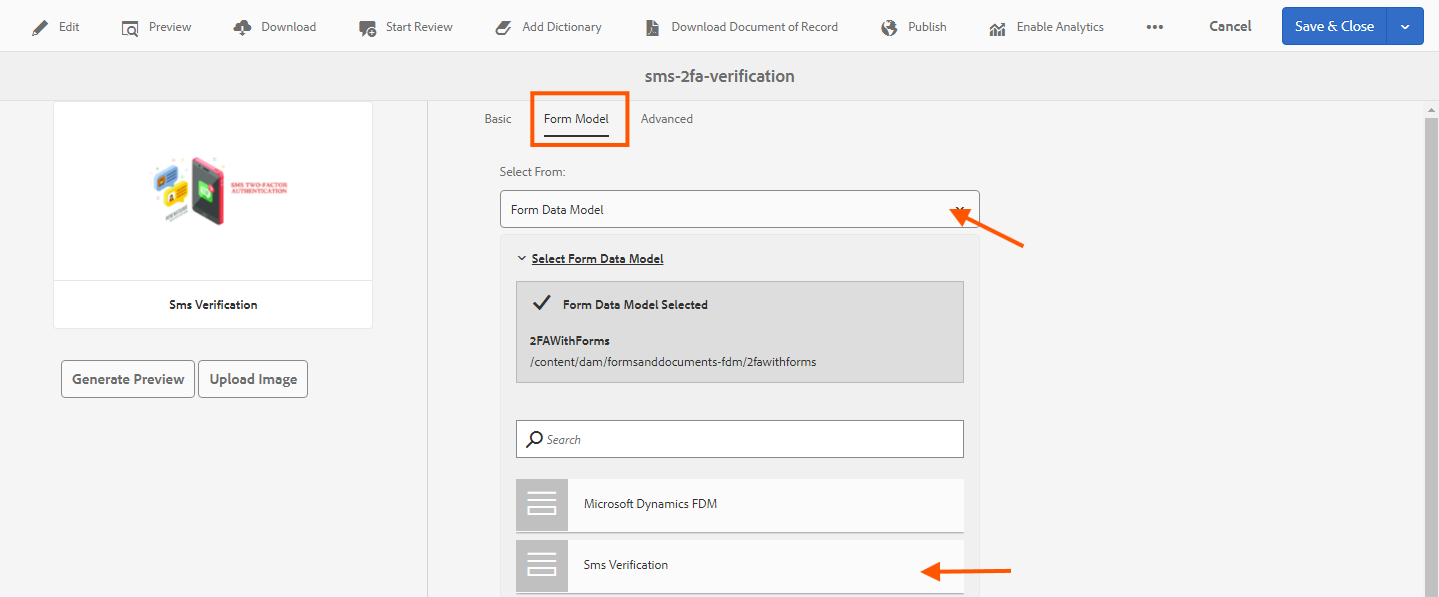
Create an Adaptive Form
Connect your form's data with the adaptive form to check the phone number users enter. You can make your own adaptive form and use its data to send and check OTP codes the way you need to.

Go to properties

Select your form data model
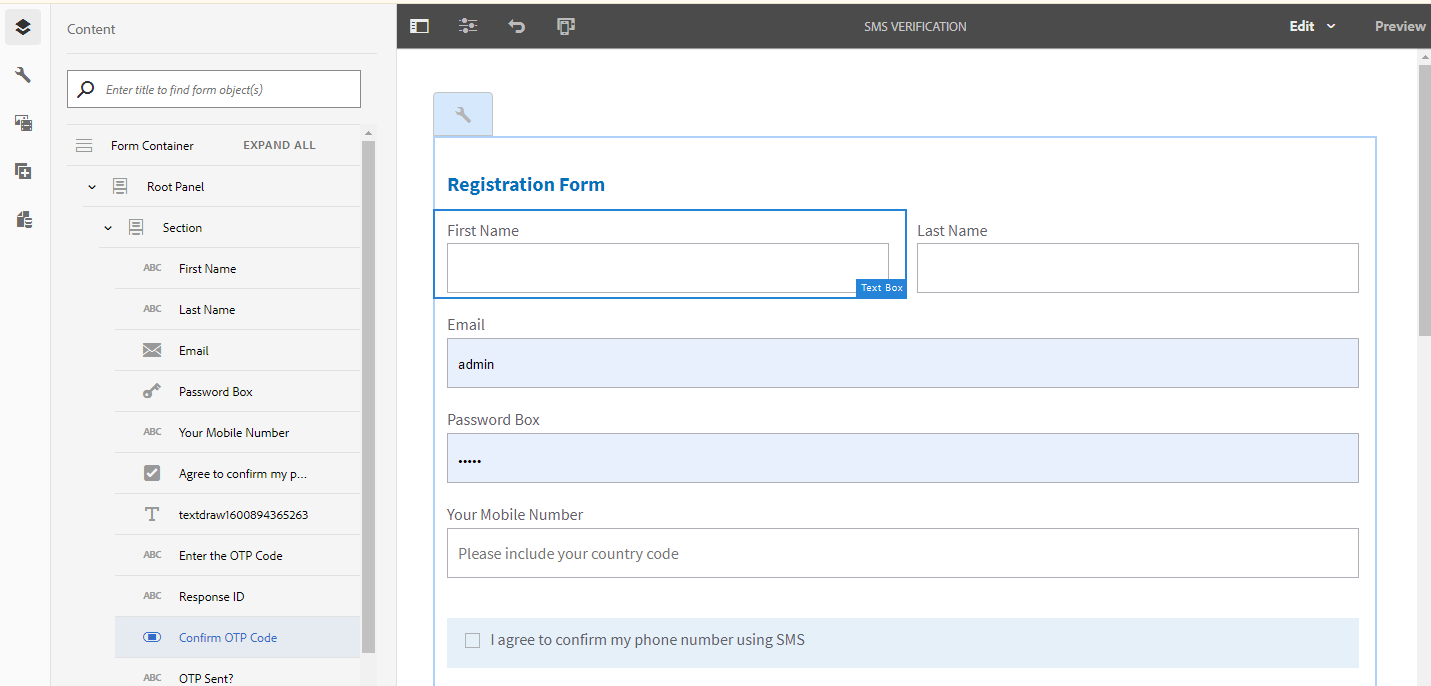
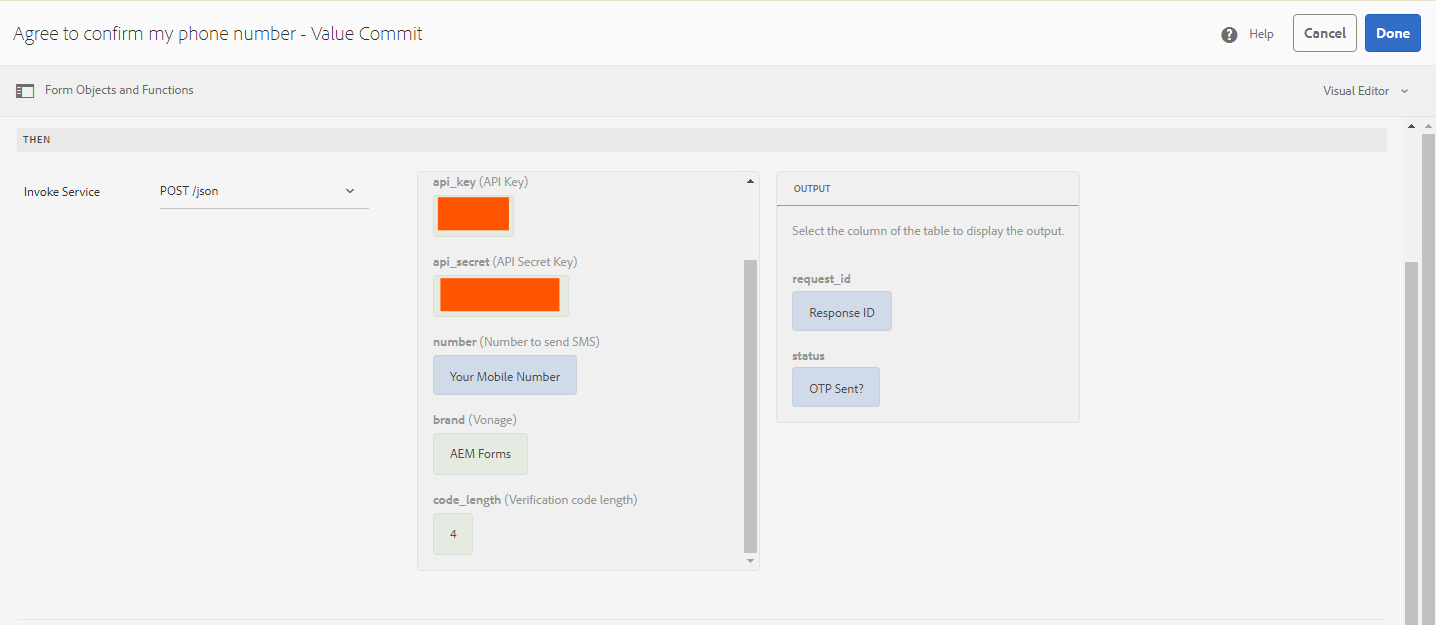
Open the form in edit mode. Open the rule editor for the following field.Provide your API key and API Secret Key.
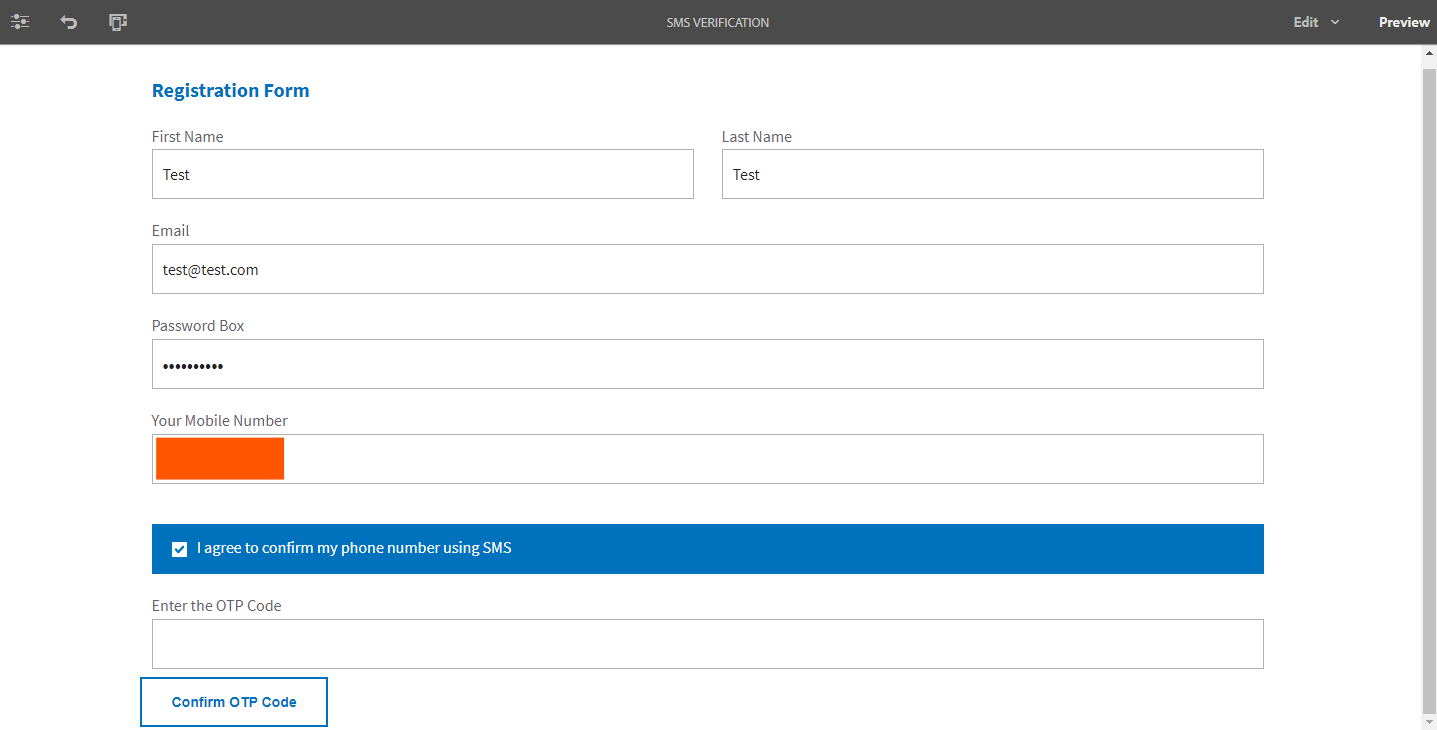
Always use country code.
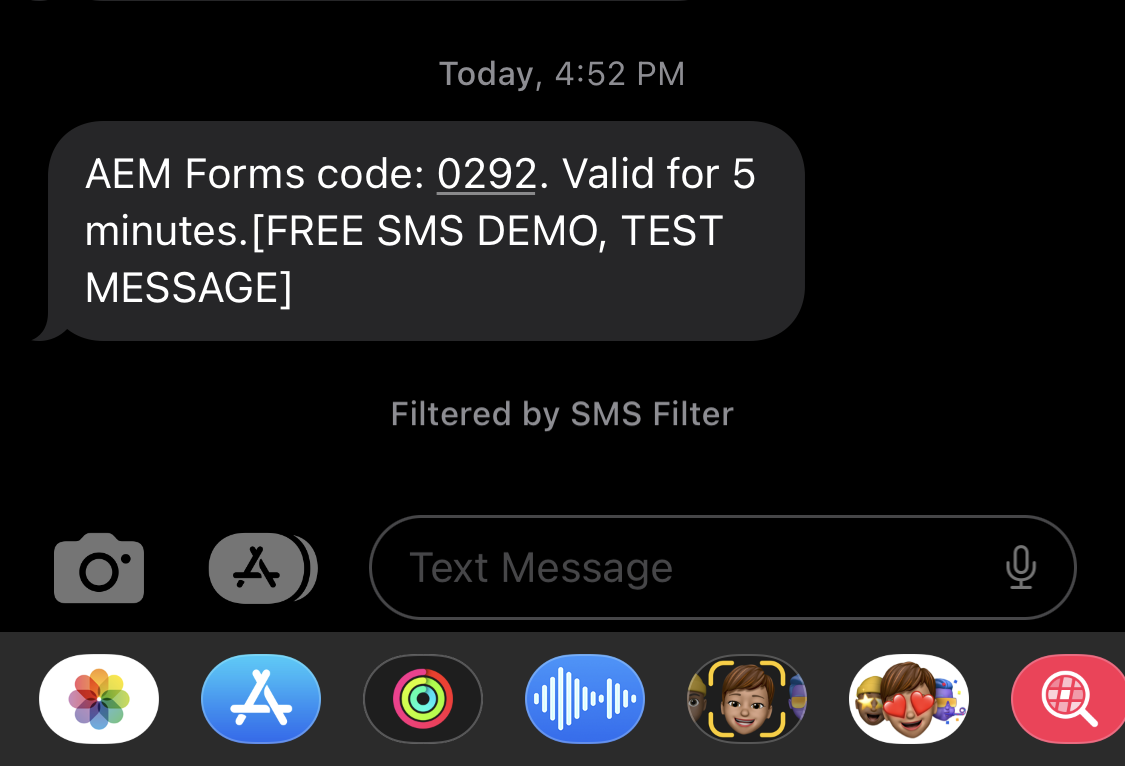
OTP Sent Successfully
In conclusion, SMS-based two-factor authentication enhances security, improves user confidence, and aligns with industry best practices. Integrating SMS 2FA with AEM Forms empowers organizations to protect sensitive data and mitigate security risks effectively. Strengthen your security posture today with SMS 2FA and AEM Forms.
I'm glad you found this article interesting and informative! Feel free to share it with your friends to spread the
knowledge.
Don't forget to follow me for upcoming blogs. Thank you!


